Showing posts with label handmade flowers. Show all posts
Tuesday, January 7, 2014
Live, Laugh, Love, Eat
With the new year comes New Year Resolutions! I need to up my activity level again :) This photo was taken a few years ago at a the Iron Girl in Seattle. I did the 5K that day.
We ate a honkin' breakfast right after the 5K and all we could think about was finishing as fast as we could so we could go straight to breakfast.
Some fun elements of this scrapbook page:
1) Flower - I added a yellow misted flower to the top right hand corner of this scrapbook page but I put a spin on its use. Instead of adding a flower center, I used the flower to accent the corner of my photo, adding die-cuts, bling and ribbon to frame out the photo as well.
2) Arrow - I jazzed up the die-cut arrow (I think I might have even cut it out from the patterned paper) with some adhesive gems and Liquid Pearls.
3) Scene - I knew I wanted to add that tree to my page so to work it in, I hand cut some hills out of green card stock. I was able to use one side as a journaling area for my scrapbook page.
I hope 2014 is treating you well so far! Put your goals down on paper and set off to achieve them!
Thursday, January 2, 2014
Fall Card - Handmade Burlap Flower
I love the traditional colors of fall but sometimes, the color palette needs a nice POP! Here I chose to use some bright blue card stock and a decorated chipboard frame.
There's lots of texture in this card...twine, ribbon, heat embossed crackles, and burlap.
The handmade flower was created using burlap which I glued to some card stock. I simply hand cut all the "circles" and stacked them together for that purposefully imperfect look!
The papers are by Nikki Sivils created for an event at Scrapbook News and Review a couple years ago.
Hope you enjoyed! May your new year be filled with health, peace, love, happiness, and joy!
Tuesday, December 3, 2013
Handmade Ornament Tutorial - Handmade Tag Tutorial
Well, I've been kicking it into high gear with lots of things to do this month! Here's a tutorial on that ornament/tag I teased about! I basically covered a chipboard piece with patterned paper, added some fun buttons and a hat pin and I had a beautiful ornament which can double as a tag! If you didn't get to see it, HERE is the previous post in which I used it as a tag on a gift bag.
Flower Tag by Maureen Esquillo-Kao Supplies Button: Bazzill;
Trinket Pin: Maya Road ;
Chipboard: Stampin Up; Stamp: Prickley Pear; Watermark Ink: Tsukineko; Glitter:
Stampin Up; Other: Twine, cardstock, patterned paper, pearl
Supplies
Chipboard shape with flower in the center
Patterned Paper
Blue cardstock
Red cardstock
Clearly Beautiful Tree stamp set from Prickley Pear
Watermark ink, embossing ink, or craft ink (one of the
three)
Glitter
Blank Ink
Inking tool (optional)
Button with bling
Trinket Pin
Glue
Cutting blade
Scissors
Twine
Crop-a-Dile
File/sanding block
Glass mat/cutting mat
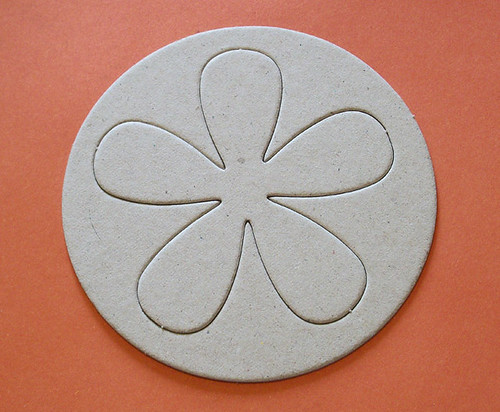

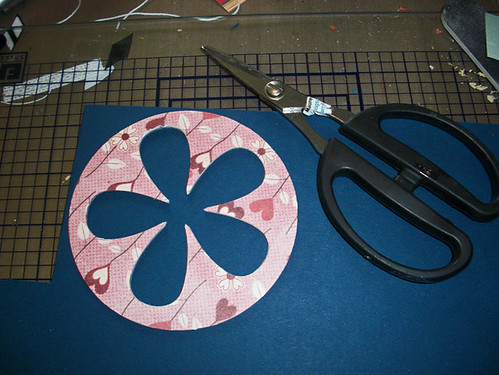
Step One: Take your piece of chipboard and pop out the flower. You can choose to sand the edges.
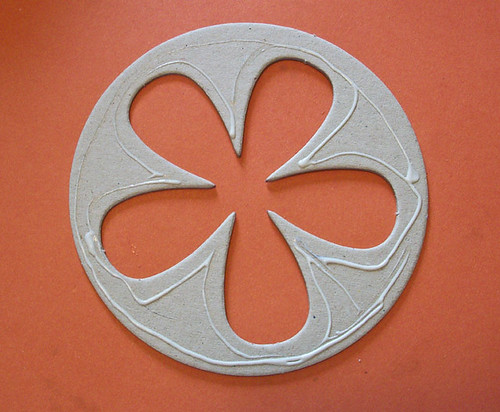
Step Two: Place glue on the front/top piece of your chipboard.
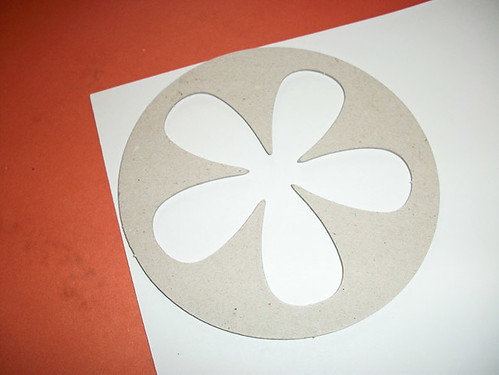
Step Three: Turn over the chipboard piece and place on the
backside of your patterned paper. I like
to line my chipboard at the corner of the paper to conserve paper.
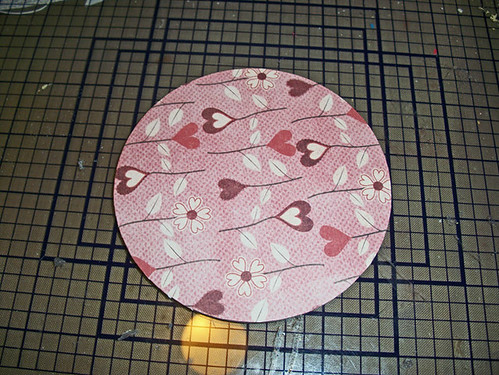
Step Four: Cut out the circle with regular scissors or your
cutting blade.
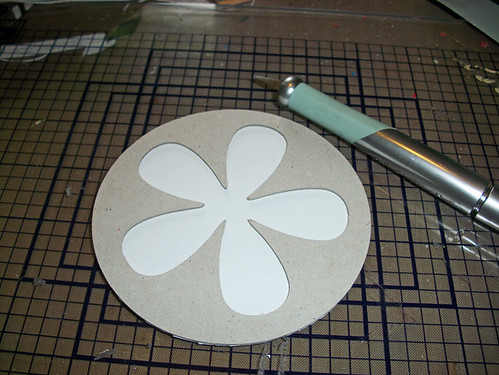
Step Five: Turn the chipboard over so that you can cut the
flower shape from the patterned paper.
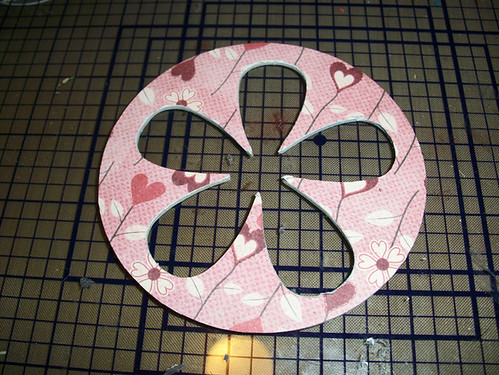
Step Six: This is how your chipboard piece will look after
you cut out the middle. Turn this piece
over onto the red piece of cardstock.
You will use it as a template to trace out the flower.
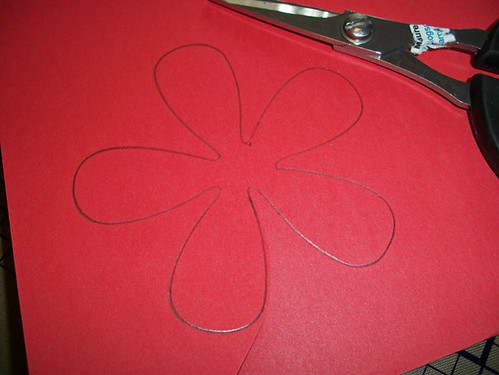
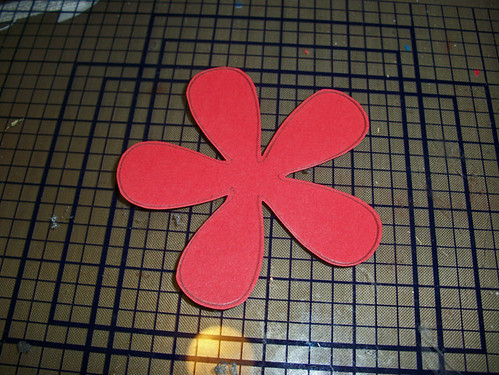
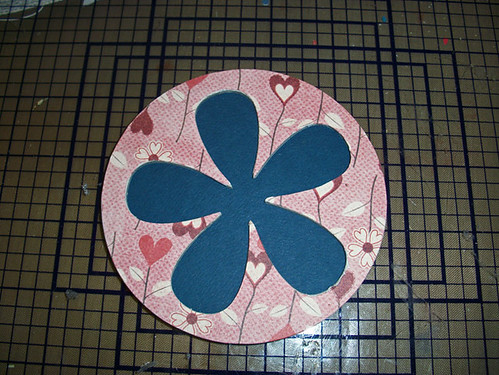
Step Seven: After tracing out the flower, cut the shape out,
but be sure to allow some space (about two millimeters) between your penciled
line and your actual cut (the template is smaller than the actual flower). This way, the flower will fit on the
chipboard flower you set aside earlier.
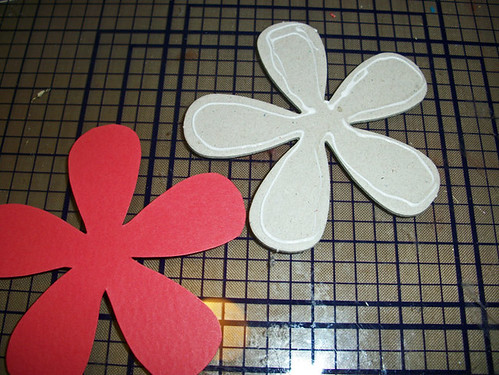
Step Eight: Turn your flower over after cutting so that you
do not see the penciled outline. Place
glue on your flower and adhere the red cardstock flower onto the chipboard
flower.
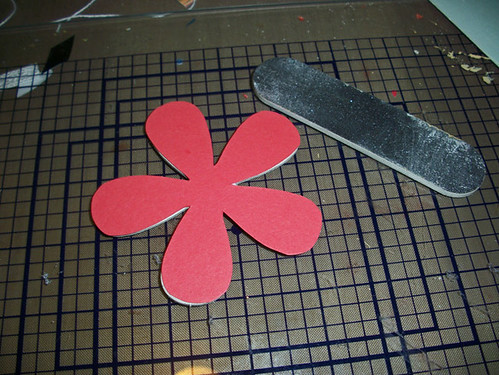
Step Nine: Sand the edges if needed.
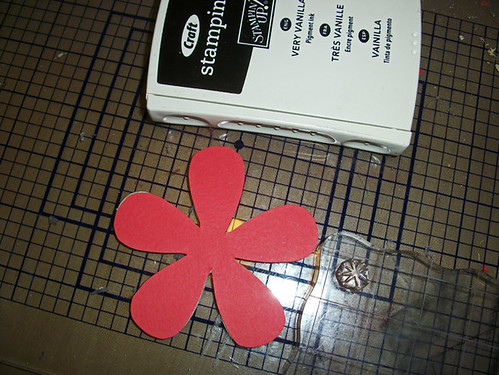
Step Ten: Ink up your stamp with white craft ink, watermark
ink, or embossing ink. (Note: I used craft ink but after heat setting, I prefer
watermark ink or embossing ink because it holds the glitter better.) Stamp
several times, covering the flower. You won’t need to stamp the middle of your
flower because this area will be covered later.

Step 11: Add glitter and heat set with your heat gun.
Step 12: Ink the edges of the chipboard flower. Also, ink
the outside edges of the chipboard circle (photo not shown).
Step 13: Place glue on the back side of the outside/circle piece of chipboard and glue down onto a piece of blue cardstock. Cut out the chipboard circle with a pair of scissors or cutting blade.
Step 14: Using a Crop-a-Dile, punch a hole through the
center of the red chipboard flower and insert the button. (The button I used had prongs. You may skip
this step if the button you use is flat.)
Add some glue to the ends of the flower petals (on your red chipboard
flower) and adhere to the circle piece as shown in photo.
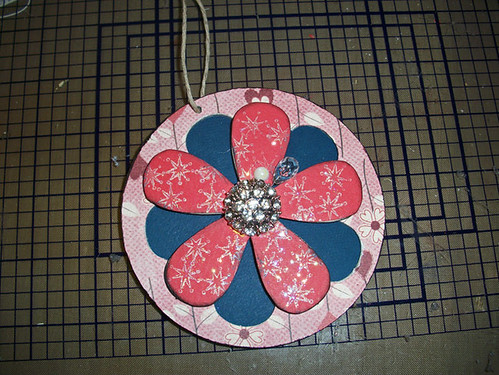
Step 15: Add the pearl and trinket pin (insert carefully
behind your flower). Punch a hole at the
top of the tag and tie on some twine.
Because the back of your tag is covered with paper, you can write your
greeting back there. Your ornament is
ready!
Hope you enjoyed that tutorial! You can see on THIS POST how I used it as a gift tag!
Thursday, November 7, 2013
Create a Flower with Ribbon or Other Trim
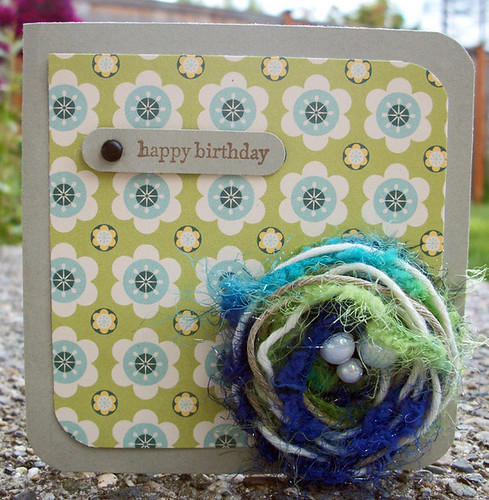
I love fluffy texture rich flowers like the one created for the card above. The fun part is that I created that flower with string and yarn! Yep! And here's a fun tutorial to show you guys how I created the flower above! In this tutorial, I used Glubers but all you really need is a piece of cardstock cut into a circle as the base for your flower. Just add some high tack glue like craft glue, Tombow Mono Multi glue or similar glue to the circle so that you can slowly wind and press your trim into a spiral starting at the center of the flower. For details, see my tutorial! Enjoy!
Supplies
Scissors
Glubers or Large Adhesive Dot
Ribbon
Tulle
Yarn
Step One: Cut about a 2 foot length of tulle, ribbon
and yarn. You can use the yarn to tie
together the ends of the braid. Note:
Experiment with different kinds of fabric, twine, and string.
Step Two: Braid until you have about an 18 inch length of trim. Again, use the yarn to tie off the end and snip off the excess trim. This will be the piece you will wind into a flower. Note: You may need varying lengths of trim depending on the width and thickness of each trim. 18 inches was just the amount I needed to create this flower.
Step Four: Tuck the end piece under so that it does not
show. Trim away any excess adhesive from
the bottom of the flower (if there is any).
Keep your flower on the glue dot until you are ready to use it on a
project.
Braided Trim Flower
by Maureen Esquillo-Kao Supplies Yarn: EK Success; Adhesive Dot/Gluber: Cosmo
Cricket; Other: Ribbon, tulle
If you want more fun and fabulous out-of-the-box ideas, you really need to take my Creating with String Class: Embellishments available soon.
Until then, you can check out my Creating with String class that focuses on creating backgrounds!
Get ready to get your hands good and inky with this inspiring class. I’ll show you how to stamp, masks and make impressions with string. I’ll even go over fun ways to store them either very cheap or even free! You’ll learn how to create beautiful backgrounds to incorporate onto your cards, pages, tags, ATCs and even altered items. You can also apply the techniques learned in this class to mixed media projects and art journal pages.
Everything you’ll learn in A String of Ideas: Creating with String is applicable to multiple disciplines of fun and you’ll see artwork in action as I share and discuss scrapbook pages, cards and tags created specifically for this class.
The class is presented in video format and accompanied by helpful PDFs to illustrate the ideas and techniques you’ll use over and over again. There are 6 finished projects in this class as well as 27 backgrounds. You'll never look at a piece of string the same way again!
Until then, you can check out my Creating with String class that focuses on creating backgrounds!
Yes, you read that right. A String of Ideas: Creating with String focuses on using string in your crafty play. You’ll also employ other stash busting items such as baker’s and hemp twine, embroidery thread, yarn and even ribbon as a tool in your artwork and to partner them with different mediums such as ink pads, reinkers, acrylic ink, mists and watercolor for a variety of looks. Spritz, splash, dribble, drizzle, roll and stamp until your heart’s content.
Everything you’ll learn in A String of Ideas: Creating with String is applicable to multiple disciplines of fun and you’ll see artwork in action as I share and discuss scrapbook pages, cards and tags created specifically for this class.
The class is presented in video format and accompanied by helpful PDFs to illustrate the ideas and techniques you’ll use over and over again. There are 6 finished projects in this class as well as 27 backgrounds. You'll never look at a piece of string the same way again!
Saturday, August 3, 2013
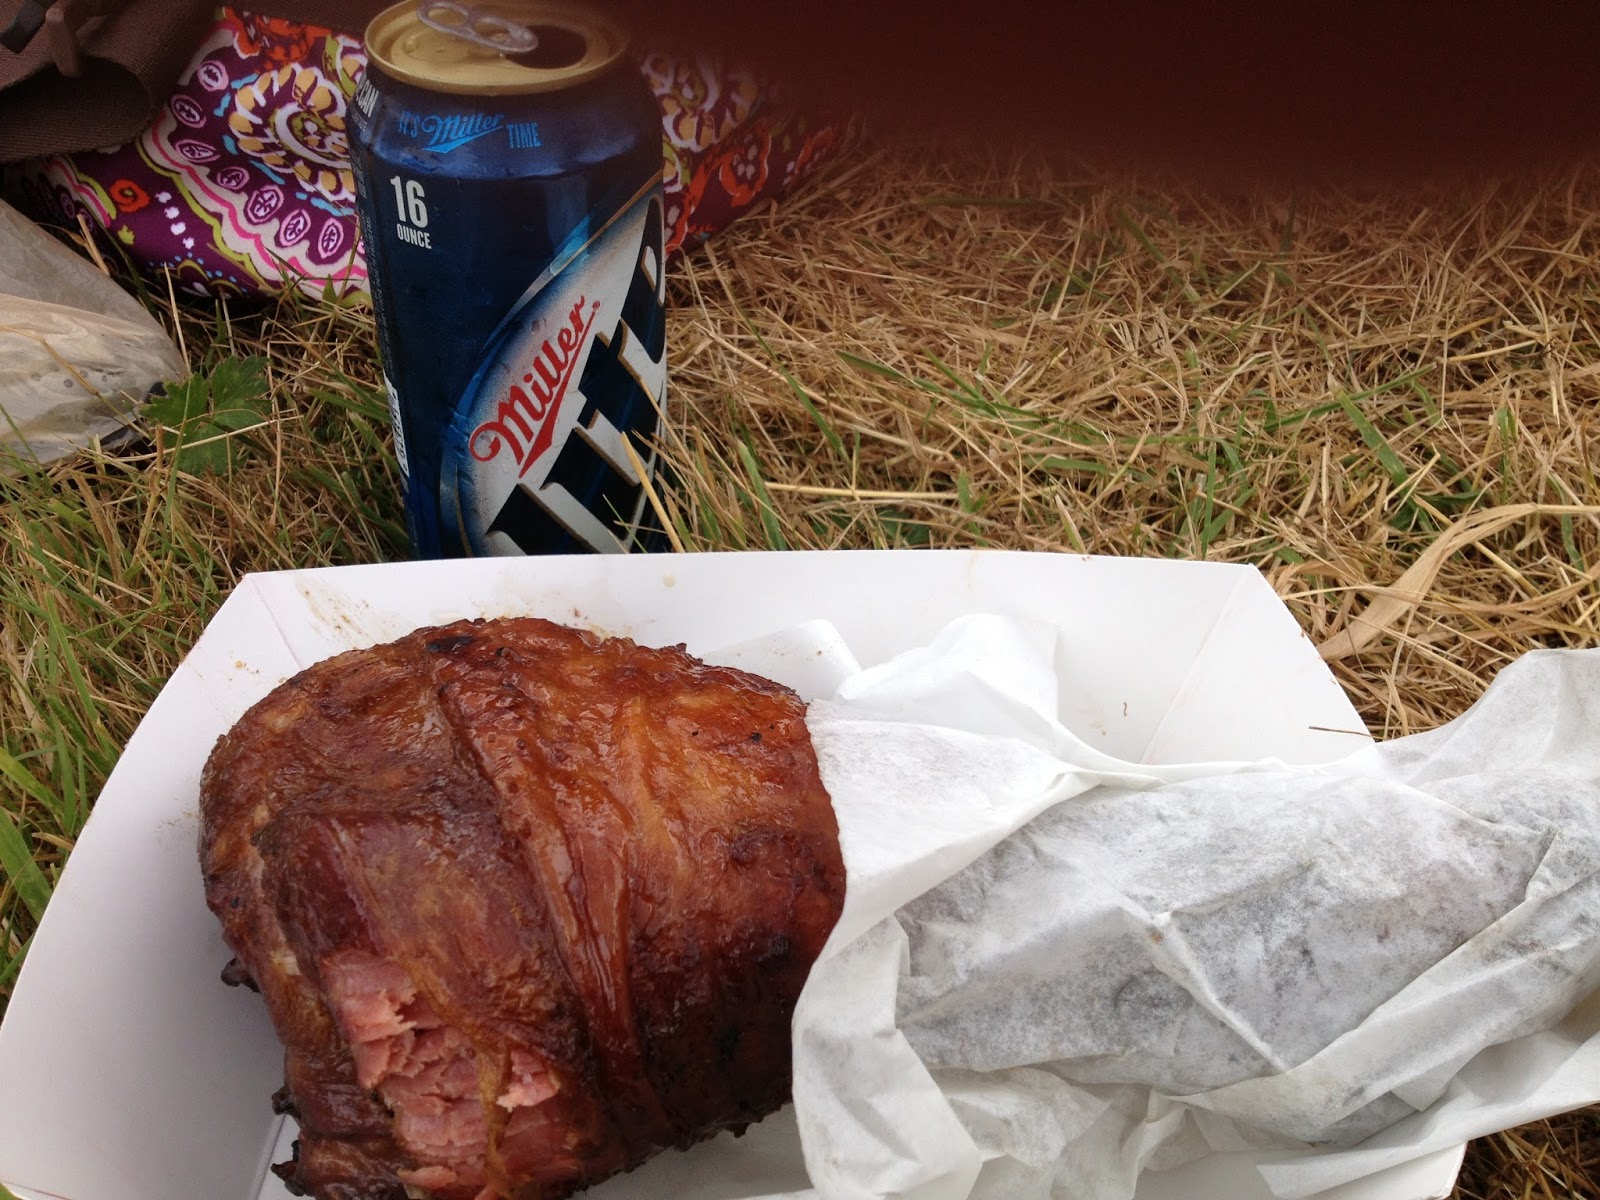
Hauls, Warriors, and Turkey Legs!
So I recently did this haul video for fun. I picked up some fun stuff at Michaels and thought I'd share. I also made it a point to USE what I bought almost immediately after I bought the items! If I keep this up, I'll be "allowed" to buy more ;)
I'm happy to report that I DID use most of the items I bought! Most items I created ended up as example projects in my A String of Ideas: Creating with String Class. But I'll share you a sneak of one of my favorite items.
I used the textured cardstock (Recollections), the yarn-wrapped wire, and a handmade flower I created using yarn, ribbon and raffia. I also used one of the Memory File clear stamps sets by Heidi Swapp as well as the cute instaframes and rub-ons from that same collection.
All of these items were on sale or clearance! I am so happy with everything I bought!
I scrapbooked about a recent sister day I had. The three of us decided to do the Warrior Dash here in Washington and it was good fun! Actually, I signed up with a friend who go pregnant and then I begged my sisters to sign up so I wasn't alone. I think there were about 12 obstacles and it was AWESOME!
Over the last month I've been packing and moving items out of my craft room. That also meant purging LOTS of items from my house and hauling boxes upon boxes up and down the stairs. Anyway, I decided that this was all great training for this event and I was right! Amazingly I was able to complete the obstacles without much of a struggle due to all the arm and leg strength training. The running...wasn't so great ;)
Here are some fun Instagrammin' photos to share!
I'm currently working on my next class. It's a frame photo magnet you can put on your fridge. It's the perfect gift to give and I'll be sharing some gift giving ideas soon!
I've got some blog plans in the works. Just planning things out a little more and getting on a good blog and YouTube schedule. If I keep my mojo going, it's helpful when coming up with class ideas.
I hope you're all having a wonderful weekend! Thanks for stopping by!
xoxo
Mo
Saturday, December 15, 2012
Crazy Aloha to You!
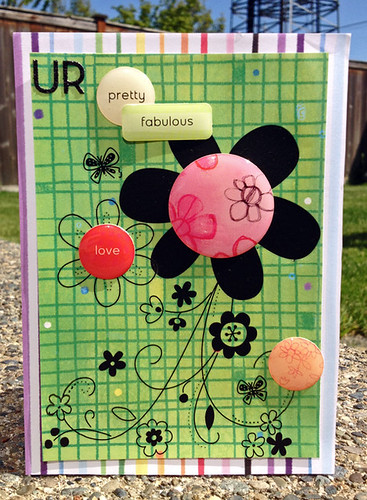
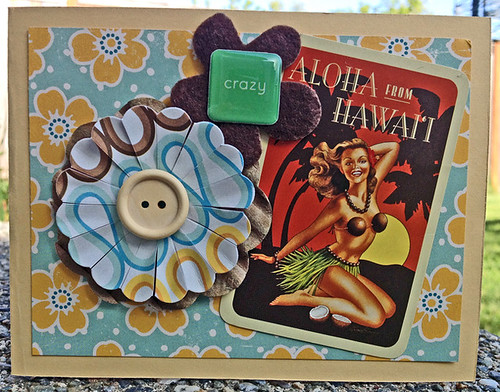
Oh how I miss summertime on wet and cold months like these in December! I love the season but I miss the sunshine. I've got a couple cards to share today that were really simple to make. I dug deep in my old stash on this first card...

I used lots of papers and epoxy stickers here. I had some REALLY OLD Stampin' Up! rub-ons and decided to use those on this card. I like how it's got a sort of doodled effect to it. The epoxy stickers added lots of fun shine and texture and also helped me create a greeting on the card. Easy peasy!

And more stash items here. The flower was created with a fabulous die from My Favorite Things...it really is one of my favorite things to use! While on a trip to Hawaii, I purchased a deck of cards. I still have a few of those laying around so if you REALLY wanted one, let me know. I sold a few of them on my Etsy site for a good deal!
I am really seriously going through my stash of cards. I've given lots away this year and my collection is dwindling! I need to sit down and make a bunch! What else am I going to share with you all?
Hope you're having a fabulous week! Happy Holidays!!!

I used lots of papers and epoxy stickers here. I had some REALLY OLD Stampin' Up! rub-ons and decided to use those on this card. I like how it's got a sort of doodled effect to it. The epoxy stickers added lots of fun shine and texture and also helped me create a greeting on the card. Easy peasy!

And more stash items here. The flower was created with a fabulous die from My Favorite Things...it really is one of my favorite things to use! While on a trip to Hawaii, I purchased a deck of cards. I still have a few of those laying around so if you REALLY wanted one, let me know. I sold a few of them on my Etsy site for a good deal!
I am really seriously going through my stash of cards. I've given lots away this year and my collection is dwindling! I need to sit down and make a bunch! What else am I going to share with you all?
Hope you're having a fabulous week! Happy Holidays!!!
Sunday, November 25, 2012
uR Priceless: A Doodled Effect/Stamped Background Card Tutorial
Let me start with some amazing deals! I can't believe how packed this issue is! I've recently posted a few projects on my Facebook page inspired by tutorials from this issue as well as past issues. I'm someone who lives and breathes scrappy happiness, and I tell you YOU CAN'T EVER know everything! Be inspired by countless projects and tutorials in this issue and 2013 will bring fabulous inspirational themes and tutorials (just wait and see). Ahem...I have a few tutorials in here too...
ready to hear the news?????
***
Between now and Monday night (November 26, 2012 at 11:59 pm), purchase a Lifetime subscription (of Scrapbook News and Review) at the deeply discounted price of $39.99 for yourself and we'll give a free Lifetime subscription to the person of your choice and send the proceeds to those who have lost so much this holiday season from Hurricane Sandy.
Purchase the Lifetime subscription here and then drop us a note at helpdesk@scrapbooknewsandreview.com with the name and e-mail address of the person you want to gift the subscription to and we'll do the rest!
P.S. If you already have a subscription, then grab a subscription for a friend and we'll give another friend a free subscription and then pass on the proceeds to charity.
You can also SEE THE MAGAZINE FOR FREE until Monday night (as referenced above). Just go HERE (subscription page) and use promo code FREESNR12.
***
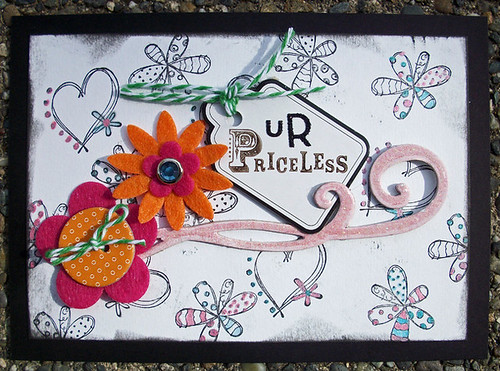
Here's another tutorial I'm sharing, previously published in Scrapbook News and Review's July 2012 issue. If you haven't realized it by now, I try to stretch my scrappy supplies by using stamps in various ways. Doodles are fun and popular right now. If you don't feel confident in your doodling skills, try using a doodled image stamp(s) to create a patterned paper. Here I've added pops of color to the stamped images, completing my card with felt flowers, chipboard, twine, and brads from my stash.

(click on photo above for a supply list)
Supplies
Black cardstock
White cardstock
Small alphabet stickers
Felt flowers
Brad
Chipboard button
Bakers twine
Chipboard swirl
Chipboard tag
Outline stamps
Sentiment or word stamp
Pearlized ink (Smooches) or any colored pens/pencils
Black ink
Solvent ink (if using glossy/smooth finished chipboard tag)
Hot glue gun (or other strong adhesive)
Paper trimmer
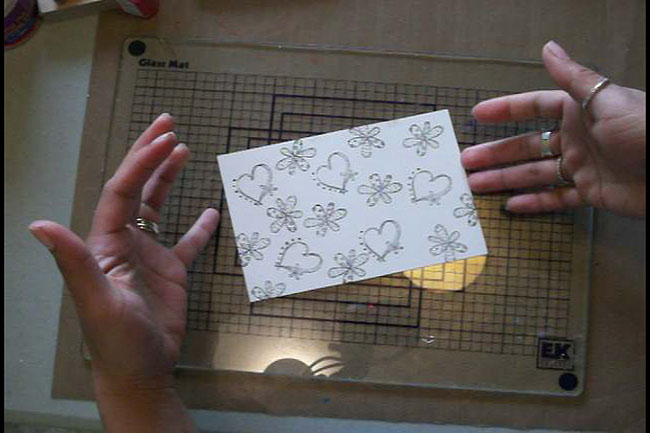
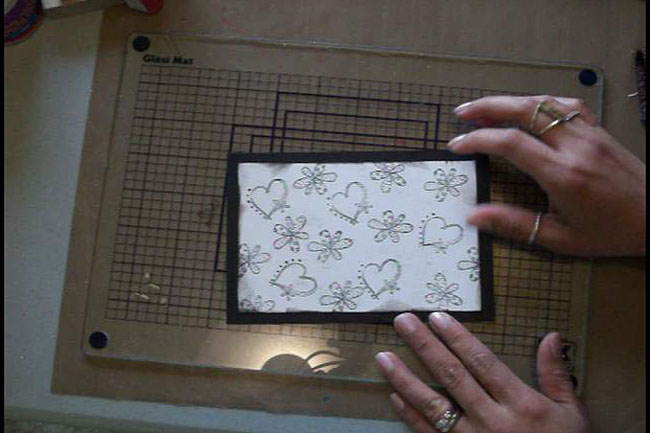
Step One: You will want to use a couple stamps with an
outlined image you can color in. I used
two stamps and some black ink. You can
use one or more stamps to stamp a background onto some white cardstock. Stamp some images off the edge of the
cardstock.
Step Two: Ink the edges of the white cardstock with
black ink.
Step Three: Glue the white cardstock onto some black
cardstock so that you have a black border around the stamped background.
Step Four: My chipboard tag has a glossy finish to
it. In order to stamp my word stamp onto
the tag, I need to use Solvent Ink so that the ink doesn’t smear. If your tag doesn’t have a smooth finish, you
can use the same ink you used to stamp your background.
Step Five: Color in the stamped outlined images with
colored inks. I used Pearlized inks by
Smooches (Clearsnap). You could also use
colored pens or pencils.
Step Six: Add some baker’s twine to the chipboard
tag. Put together your felt flowers with
brads or chipboard buttons and some twine.
I like to use a hot glue gun to glue the flowers together.
Step Seven: Use a hot glue gun (or other strong adhesive)
to glue your chipboard swirl onto your card.
Step Seven: Use a hot glue gun (or other strong adhesive)
to glue your chipboard swirl onto your card.
Step Nine: Add the felt flowers to the card with the hot
glue gun.
Step Ten: I added some alphabet stickers (“u” and “r”)
above the word “priceless”.
Step Eleven: If needed, trim the twine on the tag and the
flower.
Don't forget to hop over to SNR and get in on those great deals! You have till Monday November 26th at 11:59 pm...so HURRY!
Happy Crafting!
Subscribe to:
Posts (Atom)