Showing posts with label mixed media. Show all posts

Thursday, November 7, 2013

Create a Flower with Ribbon or Other Trim

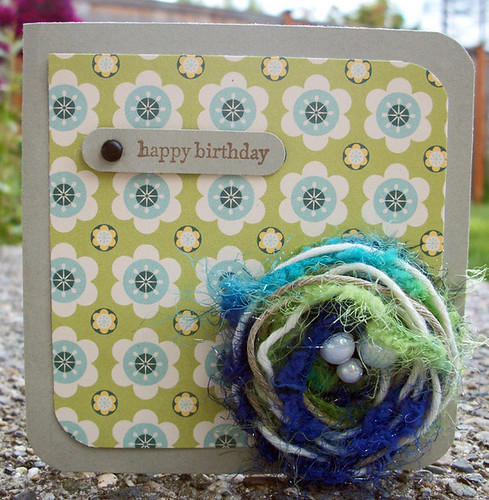
flower birthday card

I love fluffy texture rich flowers like the one created for the card above.  The fun part is that I created that flower with string and yarn!  Yep!  And here's a fun tutorial to show you guys how I created the flower above!  In this tutorial, I used Glubers but all you really need is a piece of cardstock cut into a circle as the base for your flower.  Just add some high tack glue like craft glue, Tombow Mono Multi glue or similar glue to the circle so that you can slowly wind and press your trim into a spiral starting at the center of the flower.  For details, see my tutorial!  Enjoy!


Supplies
Scissors
Glubers or Large Adhesive Dot
Ribbon
Tulle
Yarn


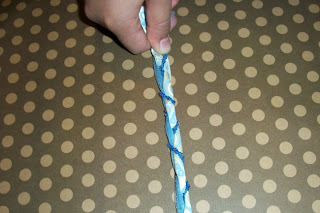
Step One:  Cut about a 2 foot length of tulle, ribbon and yarn.  You can use the yarn to tie together the ends of the braid.  Note: Experiment with different kinds of fabric, twine, and string.


 Step Two:  Braid until you have about an 18 inch length of trim.  Again, use the yarn to tie off the end and snip off the excess trim.  This will be the piece you will wind into a flower.  Note: You may need varying lengths of trim depending on the width and thickness of each trim.  18 inches was just the amount I needed to create this flower.


 Step Three:  Take off the top layer of film from the Gluber and press one end of the braided trim into the center of the glue dot.  Slowly wind the trim into a spiral, using your thumb and fingertips to help flatten the trim as you continue to wind.  Wind until the flower is the size you like or until you’ve reached the edges of the glue dot.

Step Four:  Tuck the end piece under so that it does not show.  Trim away any excess adhesive from the bottom of the flower (if there is any).  Keep your flower on the glue dot until you are ready to use it on a project.


Braided Trim Flower by Maureen Esquillo-Kao Supplies Yarn: EK Success; Adhesive Dot/Gluber: Cosmo Cricket; Other: Ribbon, tulle

If you want more fun and fabulous out-of-the-box ideas, you really need to take my Creating with String Class:  Embellishments available soon.

Until then, you can check out my Creating with String class that focuses on creating backgrounds!


Yes, you read that right. A String of Ideas: Creating with String focuses on using string in your crafty play. You’ll also employ other stash busting items such as baker’s and hemp twine, embroidery thread, yarn and even ribbon as a tool in your artwork and to partner them with different mediums such as ink pads, reinkers, acrylic ink, mists and watercolor for a variety of looks. Spritz, splash, dribble, drizzle, roll and stamp until your heart’s content. 

Get ready to get your hands good and inky with this inspiring class. I’ll show you how to stamp, masks and make impressions with string. I’ll even go over fun ways to store them either very cheap or even free! You’ll learn how to create beautiful backgrounds to incorporate onto your cards, pages, tags, ATCs and even altered items. You can also apply the techniques learned in this class to mixed media projects and art journal pages. 

Everything you’ll learn in A String of Ideas: Creating with String is applicable to multiple disciplines of fun and you’ll see artwork in action as I share and discuss scrapbook pages, cards and tags created specifically for this class.   


The class is presented in video format and accompanied by helpful PDFs to illustrate the ideas and techniques you’ll use over and over again. There are 6 finished projects in this class as well as 27 backgrounds. You'll never look at a piece of string the same way again!


Sunday, August 4, 2013

Summer Schoolin' Kinda Fun!

The Art Studio has lots of new classes and new classes on the way!  Summertime for me is a mix of lazy days and busy times.  It just depends on the week!  The new schoolyear is around the corner and I know I'll be switching gears and getting back to a more static schedule.

Summer has always been a great time for me to learn now crafty things and take some crafty classes.  I really try to cram in some creating since I know that with the First Day of School comes lots of busy to-do's and Christmas just around the corner from there (forehead smack).  I really don't have time to breath until Spring and that's only IF the kids (or me) decide NOT to do any sports!

So go to summer school this year!  I'm trying to practice at my Mixed Media skills so I am slowly working my way through the classes, but here are some I am DYING to take!


Katie's Distress Ink class is oh so exciting!  Here's a description for you.  Click on the photo for an outline of the class!  You won't believe how much is crammed in it!

This class is the most comprehensive color theory guide you’ll ever come across and even better, it was designed with paper crafters in mind. In Color Theory with Distress Inks, we’ll focus on the use of the Distress markers line watered down to resemble watercolor paints. Of course, you can substitute Distress inks and stains for the markers and/or use the markers full-strength. Please use whatever you enjoy creating with the most!

I guarantee that this class is unlike anything you’ve seen before. Check out what you’ll learn in Color Theory with Distress Ink – From Head to Toe:

  • We’ll discuss all your options when it comes to Distress inks and how to decide which form suits you best, such as inks, markers, paints and stains.
  • We’ll then tackle the basics of using them, what surfaces to use them on and what to apply them with.
  • Then we’ll move on to color theory where you’ll learn everything related to color theory, the color wheel and what color categories, such as Primary, Secondary and Tertiary colors, the Distress ink colors fall into.
  • After that, we’ll break it all down by creating 11 different color schemes based on Primary, Secondary, Tertiary and Neutral colors, and learn how to mix colors to make your own custom blends.
  • Last but not least, we’ll wrap up the class with several dozen hair color and skin tone combinations that will provide you with an incredible array of possibilities and dramatically change the look of all your stamped images. All combinations have colored examples so you can see the differences and pick out the ones that work best for your projects.

There are over 150 examples, a few dozen color charts, a simple and friendly explanation of the color wheel as well as a complete breakdown of color groups as applied to the Distress ink color range.

Just think, you’ll combine the artistry of being able to add life and personality to any image with Distress Ink markers in a remarkable variation of colors. And forget just Tattered Rose for peachy keen faces. In this class, you’ll learn a rainbow of skin colors, from the palest Nordic skin tones to striking ethnic skin tones from all around the world. All with a simple set of markers instead of over 300 choices of other popular markers.

You will never, ever find a class like this one and when completed, you’ll know everything there is to know about color theory and how to apply this knowledge to make your colored in images look polished, balanced and full of visual interest. 

Please note that all lessons are available for download upon purchase. 


And I've GOT to make time for this one from Christy Butters - Pan Pastels for Scrapbooking.

Have you seen Pan Pastels on the web or walked by them in an art supply store and figured there’s no way you would ever use them? Or maybe you’ve already bought some and now you’re at a loss on what to do with them. Just because Pan Pastels are marketed as a “fine art supply” doesn’t mean you can't use them on your scrapbook pages. In fact, you can do just about anything and everything with Pan Pastels that you can do with other coloring mediums and sometimes, even better!


In Pan Pastels for Scrapbooking, I’ll show you a multitude of ways to use Pan Pastels on your layouts and we’ll cover the basics such as color loading and mixing, how to alter patterned paper, how to create your own unique patterned paper, and then jump into a whole lot more!


Moreover, just because this class focuses on scrapbook layouts doesn’t mean you can’t use the techniques on cards, tags and more, so get your creativity jump started with a bunch of Pan Pastel techniques that will have you using them on all your paper crafting projects.


Each lesson has a step-by-step videos and some lessons have step-by-step PDFs as well. I’ll also be on hand to walk you through the entire class, ready and willing to answer all of your questions.

So, are you ready to learn all the possibilities of using Pan Pastels? Then join me for Pan Pastels for Scrapbooking and have some fun.


Please Note: You don't need a ton of Pan Pastels to get the most from this class. A few complementary colors in colors, tones and shades will work just fine.

I KNOW RIGHT?????  I'm sooo excited!  I'll be sure to share any creations with you!

Thanks for stopping by lovies!

xoxo
Mo


Tuesday, July 23, 2013

All you need is some STRING...


Yes, you read that right. Creating with String focuses on using string in your crafty play. Employ other stash items such as baker's and hemp twine, embroidery thread, yarn and even ribbon as a tool in your artwork and partner them up with different mediums such as ink pads, reinkers, acrylic ink, mists and watercolor for various looks. Spritz, splash, dribble, drizzle, roll and stamp until your heart's content. Get ready to get your hands good and inky with this inspiring class.

I'll show you how to stamp, mask and make impressons with string.  I'll even go over fun way to store them either very cheap or even free!  You'll learn how to create beautiful backgrounds to incorporate onto your cards, pages, tags ATCs and even altered items.  You can also apply the techniques to mixed media projects and art journal pages.  Everything you'll learn in Creating with String is applicable to multiple disciplines of crafty fun.  You'll also get to see artwork in action as I share and discuss scrapbook pages, cards and tags created for this class.

The class is presented in video format and accompanied by helpful PDFs to illustrate the ideas and techniques you'll be using over and over again.  CLICK HERE for a peek at the outline!


For a chance to win a FREE seat in my class, check out my YouTube video (a free technique share from the class) and comment there for a chance to win.  Spread the word and give me some love by hitting the THUMBS UP button!

I will be offering more opportunities for a free seat in this class soon so stay tuned.  If you subscribe to my YouTube Channel, I'll be sure to let you know when and where you can enter to win!

xoxo
Mo

Wednesday, April 24, 2013

Mixed Media with Less Mess!

I've got some things in the works.  I'm editing a tutorial right now which will likely be shared on my YouTube channel and blog.  This is going to be easier than it looks....
I'll fill you in on it later, so I'll tease you with this sneaky peek!


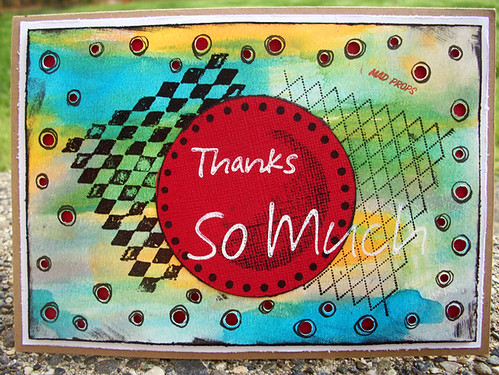
Here's a card that was published in Scrapbook News and Review Magazine's January 2013 issue.  It was a card I created for someone at work.  It's probably one of my most favorite cards and I created it with a specific person in mind.  Usually when I do this, I'm able to infuse a lot of personality into the card and I always love what I end up with!

Believe it or not, this is a hybrid card.  When I say hybrid, it's really not that difficult.  You don't even need a computer program, just a trusty camera!

Thanks So Much

Can you pick out the digitally generated part of the card?  Even in person, it's difficult to tell!  Here's the secret...
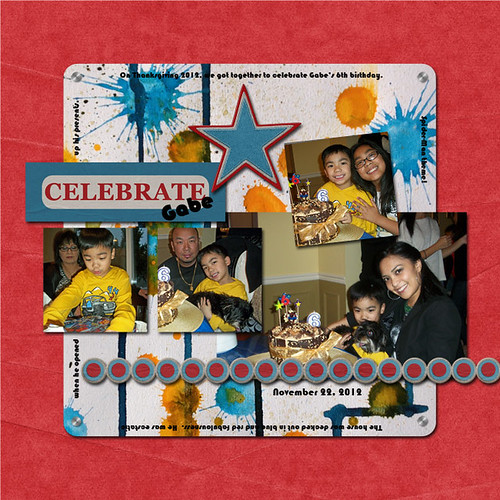
All I did was create that background (the one with the yellow, blues and greens) on mixed media paper.  You can use watercolor paper or even some white cardstock.  I brushed on some watercolor in several colors and ended up with a 11" x 14" background (watercolor paper).  I then photographed the background and cropped it to a more manageable 8.5" x 11" digital image.  From there you can print it out or even use it as digital paper when creating a digital project.  I've used this very same idea to create this scrapbook page (published in the January 2013 issue of Scrapbook News and Review Magazine):

Celebrate Gabe

This wasn't the same background paper as above.  Here I played with a dauber-topped mist bottle and some dark mist.  I created this new background that I photographed and turned it into digital paper to make more projects.  If you saw the SNR January 2013 issue, I have another hybrid card using this background.

I love this because your artwork adds an something extra special to all your projects.  It's truly one of a kind artwork you can continue to bring in to several different projects.

So there are two ways you can use personal artwork to give your projects a mixed media feel without all the extra time and mess!  I love love looooove it!

And for more ideas on using your Crop-A-Dile in more projects, check out my steal of a class.  The card above uses a technique from the class.  I've got lots more just waiting for you to learn about all wrapped up in my jam-packed class at The Art Studio!

Stash CPR: Breath new life into your stamps and Crop-A-Dile


Hugs,
Mo

Friday, April 19, 2013

We're Gonna Party Like it's Your Birthday!

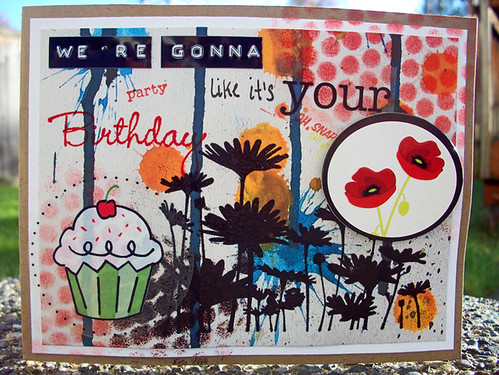
So do you have the song stuck in your mind yet?  If you don't, maybe now you do!  Today I have a card to share that was published in the January 2013 issue of Scrapbook News and Review Magazine.  I've got some fun layers of ink, stickers, chipboard, stamping, heat embossing, and stenciling.  Of course, I've got lots of bright colors as well.  I can't seem to create without a splash of color.

Party Like Its Your Birthday

And if you're curious about a supply list, just click on the photo to get to my Flickr gallery.  Direct any questions to my email momostamper(at)yahoo(dot)com.

What have you found yourself using lately?  Have you been creating your own backgrounds or using fun patterned paper?  I continue to play with paints, media, and mist so hopefully for those of you that love that stuff, you'll get to see my shares soon!

Tuesday, April 16, 2013

Wishing You Love...and drips and mists!
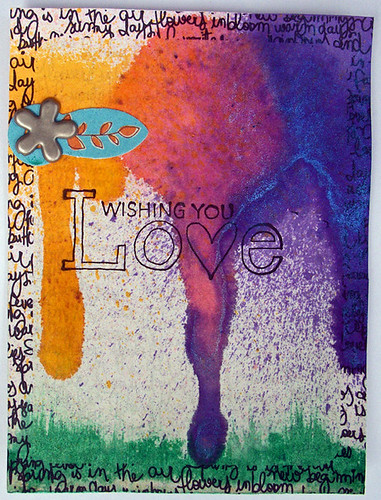
A few months ago I started taking classes at The Art Studio to expand my crafty talents.  I thoroughly enjoyed this mist class by Heidi Myers and came up with this ATC in the process.  This project was published in the September 2012 issue of Scrapbook News and Review Magazine.

Wishing You Love


This was super duper easy and I got to play with my mists that had been sitting around doing nothing!


Check out Heidi's class HERE!


Sunday, April 14, 2013

Got mists....CAN Art journal!

I've got more inky art journaling fun for you!  Thankfully last Saturday I had a rare few hours to myself which I chose to spend in my craft room (rather than cleaning...ha ha).

I took a class called Creating an Art Journal Page: Leave Your Mark by Christy Butters.  I finished the modules and PDFs in about an hour and immediately was struck with inspiration.  I spent a couple hours in my craft room creating and came up with two art journaling pages.  Actually, they are backgrounds right now which I will finish later.

Here's a photo from Christy's class:


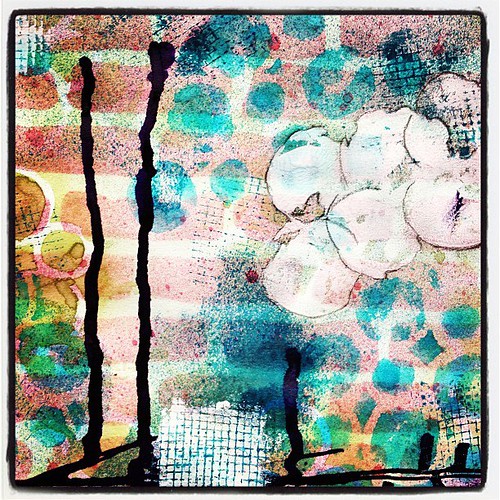
And here are a couple photos of the pages I did:

Art Journaling Page


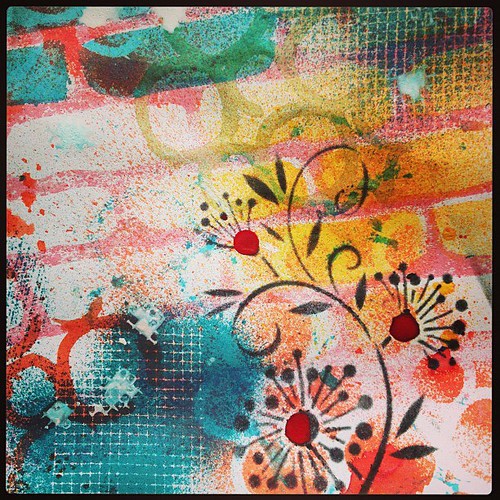
In the page above, I also incorporated a couple techniques I learned from Mists: Not Just Point and Shoot by Heidi Myers.  THAT was another fabulously fun class I took last summer!

Art Journaling Page 2

All I can say is...fun...fun...fun!!!!  I had a blast!  Thank you Christy and Heidi for the inspiration!!!!!
And the April 2013 issue of Scrapbook News and Review Magazine  is out!  Get your copy now!


Here are some the calls/content packed into this fabulous issue!

Scrapbooking
Color of the Month: Blue
Cupcakes
Everyday Things
Masks & Stencils
Mixed Media on Layouts
Sleeping Cuties
Stamping on Embellies


Cardmaking
Pinwheels
Mother's Day
Retro Look and/or Images
Congrats - New Job, Home, Baby, etc.

Mixed Media
Artist Trading Cards
Artist Trading Cards: House of Blues (All Blue or Blues Music)
Inchies: Corrugated Cardboard
Tags: Vintage Ephemera and/or Old Ads
And I'm also working on a few calls for the May issue.  I'm having so much fun.  It's going to have some awesome stuff!  I've even got a mixed media scrapbook page in there!  I hope you all have wonderful week!

Tuesday, April 9, 2013

It's been a few...

Hello all.  It's been awhile.  2013 has proved to be a bit of a challenge.  I'm trying to keep it as manageable as possible.  My family has lost two beloved souls...two grandparents in a span of 2 months.  It's sad and it takes some time to mourn, support others in the loss and then trying to get back to life.  But slowly I'm getting back into the swing of things.

It's been quite a challenge as far as mojo is concerned but I'm mustering it as fast as I can so I can bring you all more fun quick tutorials and also fun classes.  I've got a few ideas rolling around in my head and a couple classes in the planning stage.  I was hoping to get them up and running in April but I don't think that's going to happen.

So hopefully you'll hear more soon and I'll get them running by May.

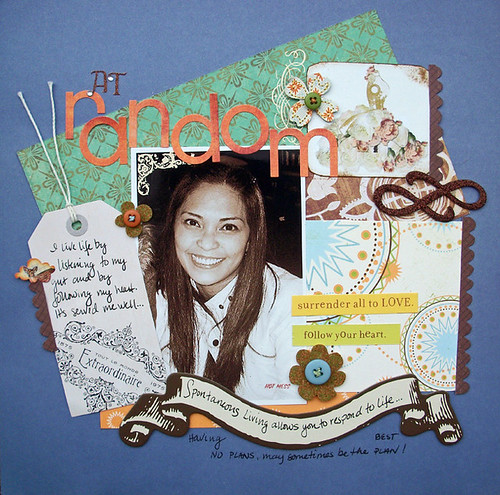
I haven't shared a traditional scrapbook page with you all in awhile.  Here's a rare one...scrapping about moi is necessary but doesn't happen often.  If they do happen, it's in response to a prompt or challenge and I'm always pleasantly surprised at what transpires.

I'm a spontaneous person.  That can be a blessing and a curse.  I tend to run my mouth unfiltered which puts me at risk for foot-in-mouth moments-a-plenty.  But luckily most of the time I think with my heart and not often do I say horrific or hurtful things...I hope....lol!

This scrapbook page was published in Scrapbook News and Review Magazine's August 2012 issue.  I don't think I had a chance to share it yet so here ya go!  If you'd like to see a supply list, click on the photo of the layout and you'll be brought to my Flickr photostream.

At Random

Here's some more fun stuff to share.  I recently created this tag for The Art Studio blog.  I play with layers of ink.  If you want to see the full tutorial, just click HERE!

Sunburst Layered Ink Tag

There are a few new classes by the other instructors, you should check em out!

Thanks for stopping by!

Hugs,
Mo

Thursday, February 7, 2013

Stash CPR: Asymmetrical Scrap Tag

Hello Friends!  Just dropping by to share a recent video I posted to my YouTube Channel.  This is a fun way to create an asymmetrical tag using stickers, mist, a border punch, inks, paper scraps and die-cuts!  Go through your stash and use up your materials!


For more fun with items from your stash, check out my newest class.  Stash CPR: Breathe new life into your stamps and Crop-a-Dile


I present 4 design concepts, create 10 cards and go thorough many tips and techniques to use up your stash.  But the star of the show is the Crop-a-Dile.  I'll show you ways to use it for much more than a hole punch!

Friday, January 4, 2013

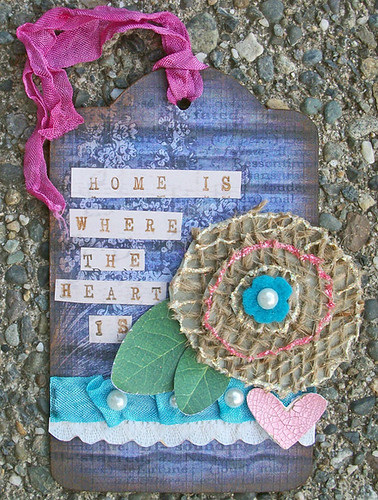
Home is Where the Heart is

where the heart is

Here is another project created for the Donna Salazar event we held over at Scrapbook News and Review awhile back.  Just now had the chance to share it!

I'd have to say that this event was one of my favorites!  Using DS papers really helps me infuse something different into my projects.  It lends a vintage and shabby chic feel to my projects....it doesn't come natural to the way I generally create but I love it!  This collection had so many fun elements that you could fussy cut (like those leaves and the lace trim).  I'm usually not a fussy cut person but I really enjoyed it with this paper line!

I fancied up a burlap flower I created with stickles, tossed in a crackle painted flower and some pearls...aaaaahhhhh!  So purdy!


Wednesday, November 7, 2012

Splatter Me Perfect!

Hello my friends!  I've got some fun challenges and prizes to tell you about!  The Art Studio is celebrating a Grand Opening now that we've got some teaching under our belts!  Stay tuned for bigger and better things to learn and see!  Take advantage of the fun kickoff and join in on the challenges and opportunities to win fabulous prizes!

Right now, we've got The Logo Challenge going on.  With the new site, there's a new logo and boy is it gorgeous!

Photobucket

Here's my take.  I create a couple projects to share.

Photobucket

Photobucket

Both projects feature fun tutorials and techniques I share in my Convertible Halloween Mini Album to Banner class.

Photobucket

Head on over to see what great projects The Art Studio instructors have shared!  They are beautiful.  Also, head on over to The Art Studio's Challenge Group to share your take on this challenge.  You'll be eligible for the prizes if you do!  You'll have to register on the site to submit your artwork.

A couple more things to note:

The Fine Print: All entries must be submitted by Sunday, November 11, 2012. You must have your name (or username ) clearly visible so we can contact you for more information. Please note that any prizes not claimed within 30 days will go to another randomly selected artists.
Please Note: If it doesn't allow you to upload to the challenge's album (some browsers have restrictions), then please feel free to start your own album. 
 
Have fun, good luck and Happy Creating!

Thursday, August 9, 2012

Misty Drips and Gesso


Not only am I lucky enough to be an instructor at The Art Studio, but I'm blessed with talented peers from which to draw knowledge and inspiration from!  I recently took Heidi Myers Mists: Not Just Point and Shoot class and it has opened the door to new possibilities for me!  (Note: It says registration has closed but it's SELF-PACED so you can access all the materials at once, just buy!)

Here is a sneak of a project featured in the September 2012 issue I just created.  I was able to apply some techniques I learned in Heidi's class.  I am in LOVE with this creation!  I can think of so many offshoots to this project and I can't wait to get in my craft room after this post to play with misty goodness some more!

And I am EDGE OF MY SEAT excited about Kate Koch's class:

 
Class starts August 11th!  Here's a CLASS DESCRIPTION:

All right. Raise your hand if you know what gesso is. One, three seven, eight...that’s it? I kid. Sort of. Gesso is one of those silly paradox types of products. Paper crafters tend to see gesso as something only a true artist (whatever that means) would use and true artists (let me know if you have a definition of one) tend to think what paper crafters do with it is ridiculous.

Well, that’s what I was recently told by an art school professor who was flipping through one of my scrapbooks and couldn’t get over how much gesso I use and in “such absurd and non-traditional ways.” Pfft. What’s traditional? Doesn’t being creative with a product that’s basically a primer make me a true artist? (Let the record show that she didn’t have an answer for that one.)

As I watched her thumb through the pages and scratch at things with her fingernails (can’t imagine how she’d take it if I went around scratching on her carefully placed fine art wall hangings, but I digress), I realized I’m one of those paper crafters who likes to do ridiculous things with gesso.

Want to slap this crazy label on your forehead? If so, then this class is perfect for you and it’s taught by a true gesso fiend. Now I can’t make you a list of all the things you’ll learn in this class cause then what would you need to take it for, right? But what I can tell you is that it’s more than just a primer or an adhesive and my obsession goes way beyond swipe and paint.

In Gesso: It’s More than Just a Primer, I’ll teach you the basics and how to apply it correctly (cause it really does matter!), simple uses for it, the way it was intended to be used (to make Ms. Prissy Professor Pants happy) and then get you thinking way outside the proverbial box.

Sadly, that’s all I can tell you but if you gather some stencils and some glitter and some sparkly stuff and some embellishments and some photos and oh heck, just sit in the middle of your scrap space and be ready to reach for anything and everything cause if gesso can stick to it (unfortunately, it doesn't stick to everything), you’ll learn how to slap it on there and do some mighty cool tricks with it.

I guess you’ll just have to jump in to the fray and find out if it’s worth the hype. Now, as with my other classes, I put a strict student cap on my classes so if you want in, then click on that Save My Spot button now and make your voice heard. Otherwise, when you do get around to buying that “kooky girl’s gesso class” and you click on the button, you may see the words “Class Sold Out” and you’ll be wishing you had listened to me in the first place. Go ahead, I dare you. Press the button.

SAVE A SPOT, because it will fill up FAST!  Katie will be there in the Group Area of the class helping you with whatever you need.  Take advantage of her presence, she's a wealth of knowledge!

Oh, and I hear you need to get a gigantic bottle of gesso for the class!!!  I  know I need to go BACK to the craft store for more!

Ha ha...I know....LONG POST, but I can't say goodbye without some quick eye candy, right?


(click on images for supply lists if you're curious)
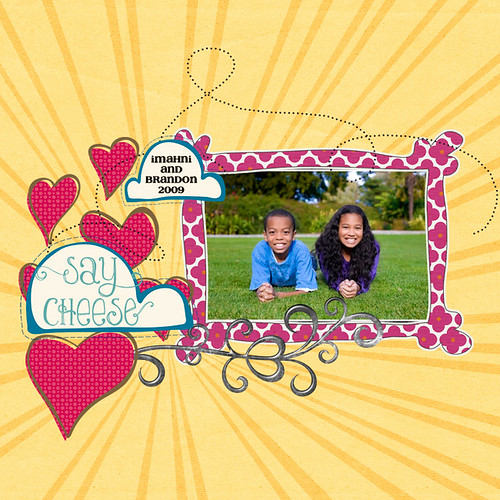
Say Cheese
Had some digi fun scrapping about my niece and nephew.  Gorgeous kids.  They're growing so fast!


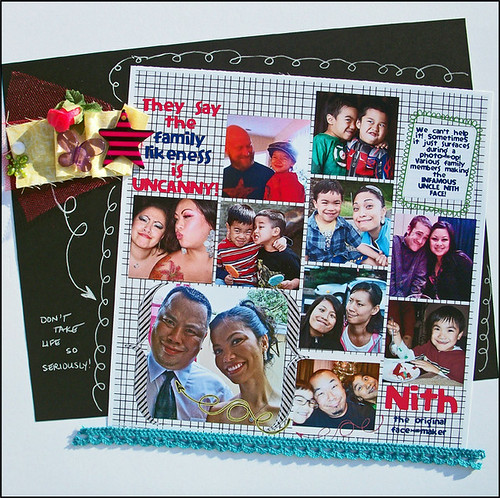
Family Likeness

This one's a hybrid scrapbook page about how the Kao Clan has this awful ugly FACE we make.  It seems to pop up when you least expect it!


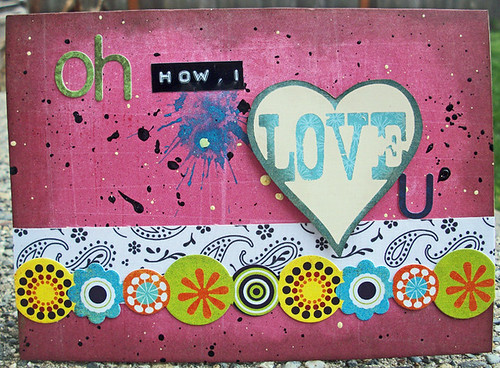
Oh How I Love You

I love this paint-splattered card made with stickers and rub-ons!


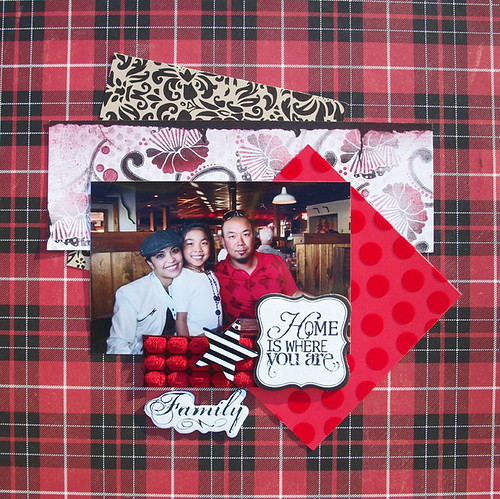
Home is Where You Are

And, we can't forget my roots....ha ha...a traditional scrapbook page with lots of prints and a burst of red!

All creations were featured in Scrapbook News and Review Magazine this year!

Just finishing out the rest of my summer trying to get all our old stuff out of the house!  I'm hoping to get a garage sale going in the next couple of weeks!  I seriously don't care what I sell everything for, just that I get it OUT of the house!  It would feel sooooo nice!

I hope you're having a great Summer so far!


Pin It

Sunday, July 31, 2011

Fun shares and a special announcement!

I hope you all are well.  As the summer wraps up, I'll be able to visit my bloggy buddies more!  So sorry for being MIA!  I'm just trying to keep my head above water at this point!

It's been a fun ride with Scrapbook News and Review and I have been expanding my talents, learning new things, and having fun creating and enjoying my scrappy time!  I've been immersed in it!

The May issue of SNR featured the following projects I now can share!  They are two of my favorite creations so far.

Birthday Memories by Maureen Esquillo-Kao Credits Digital Paper: Essentials Papers v.1 by Carina Gardner, My Dream Getaway by SKrapper Digitals, We Kit by Jessica Sprague; Word Art: SAS-y Doodles by SKrapper Digitals, Design 365 Color Kit 1 by Carina Gardner, Save The Date v.1 by iKari Designs; Stitches: Essentials Stitches v.2 by Carina Gardner, Drama Queen by SKrapper Digitals; Tape: Inspired Page Kit by SKrapper Digitals; Paperclip, Button: Drama Queen by SKrapper Digitals; Flower: Popstar by SKrapper Digitals; Brad: The New Girl in School by SKrapper Digitals; Glitter: Pink Spill Glitter by iKari Designs; Mask: Essentials Masks v.1 by Carina Gardner; Photo Effects: Instagram; Font: Carbon Type by Philip Steffen
The above digi layout might just be my most fave one.  I enjoyed creating it.  I employed lots of "stitching" into the design.  Digi has so many options I tell you!  I scrapped about my 35th birthday dinner at my favorite Korean restaurant.  My mouth is watering just thinking of it right now!

I used Instagram (on my iPhone) for the photo effects.  Yes, it's very addicting!

Next up, a card.  Lots of stamping goodness here!

Just for You by Maureen Esquillo-Kao Supplies Cardstock: Neenah; Patterned Paper: Stampin Up; Poster Board: Poster-Glo; Rhinestones: Kaisercraft, My Mind's Eye; Stamps: Stampin Up; Ink: Ranger, Stampin Up, Staz-On; Clear Embossing Powder: Hampton Art; Glitter Glue, Liquid Pearls: Ranger; Watercolor Pencils: Stampin Up; Punches: Stampin Up; Stamp Positioner: Stamp-a-ma-jig; Crop-A-Dile Corner Chomper: We R Memory Keepers; Other: Opaque embossing powders, black cardstock
I just love how your work pops off a black background.  It's so classic!
I stamped my image a few times and embossed, inked, and blinged it all out for your viewing pleasure!

And now for the EXCITING news!  This is the reason I've been MIA for soooooo stinkin' long!  Scrapbook News and Review is featuring a summer's worth of exciting creations from the SNR staffers!  You will NOT WANT TO MISS IT!  Every week, there will be at least one manufacturer showcased!
You've GOT to see the list of the manufacturers featured in PART 1!  Here, lemme throw a couple out there for you.....CRATE PAPER.....COSMO CRICKET.....

Want to hear more?  Well, lemme help you out....
check out SNR's home page for more info and return frequently to catch the lastest news!

 
Hugs,
Mo

BLOGWEAR