Showing posts with label Liquid Pearls. Show all posts

Friday, January 10, 2014

Happy Heart's Day - Creating a Quick and Inexpensive Valentine's Day Card: How to Mass-Produce a Valentine's Day Card for the Classroom


Because I've planned ahead this year, I've been able to design a quick card for the kids to give away at school on Valentine's Day.  I mean, I've got TONS of paper, ink, and know-how so WHY do I need to buy them at the store?

I designed them to be 2.5" x 3.5" which is ATC size.  I chose Kraft cardstock, a Valentine themed outline stamp, black ink, and a heart punch.  I'll go over some fun ways to add detail for those of you that want something just a tad bit more fancy.

I also have this tutorial up in video form, so if you like, check that out too!


Supplies
Kraft cardstock (use scraps if you have them)
Valentine's Day stamp or one that would work with this theme
Black ink
Heart punch
Red cardstock (or any color for hearts)
Liquid Pearls (any color - or use glitter, gems, pearls, etc)
Glossy Accents

Since I'll be creating 23 cards for my son's class and about 30 for my daughter's class, I had to make sure the design was cute but simple.  To add a splash of color, I punched the hearts out of red cardstock and dotted the middle of the flower with some Liquid Pearls in Petal Pink.

I'll go over some brief steps so you can easily mass produce this card design efficiently.


Step One:  Start but cutting down your Kraft card stock into 2.5" x 3.5" pieces.


Step Two:  If you have a corner rounder, round out the top right hand corner of each card.


Step Three:  It would be a good time to punch out or hand cut enough red hearts for all the cards you're going to make.  I had a multiple heart punch so was able to punch out 3 hearts out at one time.  I decided I wanted to use only the two biggest hearts so I punched enough to make all the cards needed for both kids' class.


Step Four:  Now, if you also have a "to/from" stamp", stamp it in an area that works for the card design.  If you're stamping this on the back of the card, work on finishing the BACK of the card first before the front since you'll be jazzing up the front of the card with Liquid Pearls and maybe even some Glossy Accents later.  That way, you don't have to wait for the front to dry before finishing the back of your card.


Step Five:  Its time for stamping.  Stamp your image with black ink on each card.  If the kids have the manual dexterity, they can probably handle the stamping.  Next glue on the hearts.  The kids can help with this part too!

Now your cards are almost done.  Add some color, texture and depth with Liquid Pearls and/or Glossy Accents (Ranger).  I simply dotted the flower centers with some pink colored Liquid Pearls and accented the top right side of each heart with some Glossy Accents.  Set aside to dry in a safe corner.

All you have left to do is tape each dum-dum/lollipop to the back of each card with some good old clear/invisible tape!

For some fabulous card making tutorials, check out my class offerings:


If you're looking for more Valentine's Day inspiration, check out my previous posts here:


Go HERE for the blog post for the above scrapbook page.


Go HERE for the blog post for the above scrapbook page.


Happy Crafting!


Tuesday, January 7, 2014

Live, Laugh, Love, Eat


With the new year comes New Year Resolutions!  I need to up my activity level again :)  This photo was taken a few years ago at a the Iron Girl in Seattle.  I did the 5K that day.

We ate a honkin' breakfast right after the 5K and all we could think about was finishing as fast as we could so we could go straight to breakfast.

Some fun elements of this scrapbook page:

1) Flower - I added a yellow misted flower to the top right hand corner of this scrapbook page but I put a spin on its use.  Instead of adding a flower center, I used the flower to accent the corner of my photo, adding die-cuts, bling and ribbon to frame out the photo as well.

2) Arrow - I jazzed up the die-cut arrow (I think I might have even cut it out from the patterned paper) with some adhesive gems and Liquid Pearls.

3)  Scene - I knew I wanted to add that tree to my page so to work it in, I hand cut some hills out of green card stock.  I was able to use one side as a journaling area for my scrapbook page.

I hope 2014 is treating you well so far!  Put your goals down on paper and set off to achieve them!

Wednesday, November 13, 2013

Card Making with Liquid Pearls - A Makeover!

Hi guys!   Just a quick share and fun "before and after" photos to show you just how much Liquid Pearls can transform a card from blah to Wow!  Below is a fun stamped card made with watercolor markers.  It's pretty cool all on it's own.....


Adding a layer of Liquid Pearls transformed the card by giving it a sassy star quality!  It just took a couple minutes.


My newest class Card Making with Liquid Pearls is available for purchase!  For an in-depth look at all the techniques you can use with your Liquid Pearls, this class is a steal!  Take your Liquid Pearl prowess a step further with Card Making with Liquid Pearls!

http://theartstudio.scrapbooknewsandreview.com/index.php/choose-your-fun/clever-cards/liquid-pearls


Sunday, October 14, 2012

It goes in Circles...Circle Card Tutorial


A Little Something by Maureen Esquillo-Kao Cardstock: Bazzill; Patterned Paper: October Afternoon; Stamps: Stampin Up; Ink: Tsukineko; Liquid Pearls: Ranger; Circle Punches: EK Success, Fiskars

This card tutorial was featured in the May 2012 issue of Scrapbook News and Review Magazine.  We were covering some design principals when creating and I came up with this quick tutorial.

Circle Cluster Card

Embellishment placement is easier than you may think.  If you keep in mind two concepts, you can create eye-pleasing embellishment arrangements on your projects.  First, remember that arrangements generally look better with odd numbers.  So, a minimum of three elements put together are more visually appealing than two or four element groupings.  The second concept to keep in mind is balance.  Balance out your elements/embellishments on your project.  The following tutorial will show you how I created a card with these two concepts in mind.

Supplies
Solid cardstock
Circle patterned cardstock
Cardstock in 3 shades that coordinate with patterned cardstock
3 circle stamps in 3 sizes
3 circle punches in 3 sizes, large enough to punch out each stamped circle
Foam dots
Craft or pigment ink in coordinating colors
Liquid Pearls (optional)


Step One:  Stamp 3 circle images on 3 different color cardstock.  Choose shades that are not too dark for pigment ink to show on.  Punch out each stamped image with a punch large enough to fit the image (or slightly larger).  The point is to have 3 different sizes of circles.  Odd numbered groupings of elements look best together.


Step Two:  Stamp a greeting on the left side of the largest circle.  Note:  If you choose a stamp that does not have an empty space in it like this one, just stamp your image on another piece of cardstock and glue to the left side of your circle.


Step Three:  Arrange your circles so that they are centered on your card, but also create a balanced cluster in the center.  Glue down the larges circle when you've decided on placement of your circle cluster.  I balanced out the large blue circle on the left side with the two smaller circles.  The orange circle is placed in the middle but slightly below the yellow circle (positioned to the right).  Play with your shapes/elements and re-position them until you find an arrangement that appeals to you.


Step Four:  To add dimension to my card, I popped up the two smaller circles with foam dots.  The yellow circle was popped up with one layer of foam and the orange circle was popped up with 2 layers of foam so that it would be slightly higher than the yellow circle.  Note: I decided to add some liquid pearls to the orange circle. Again, I kept in mind odd numbers and balance when adding the liquid pearls. I decided on a grouping of 5 with varying sizes of dots, slightly positioned towards the middle of my embellishment cluster. Grouping the liquid pearls at the top left side of the orange circle seemed to balance the cluster well.

I use LOTS of die-cuts and punches in my scrappy creations.  So much so that I've created a class around it!  In Scrapbooking with Punches and Die-Cuts we cover some design tips and tricks.  It's got tons of sketches and I show you how I complete 9 scrapbook layouts using many fun techniques to employ basic die-cut shapes like circles, squares and hearts!

So check it out!  The Bundle includes them all and soon I'll be releasing them separately into each shape so you can choose to purchase the class in segments ;)


I'll let you know when it's released!  Right now I'm focusing on my Halloween Class.  Would love it it you'd spread the word!  


GO HERE for a sample class video if you want a peek into the class!  Tootles!


Saturday, September 15, 2012

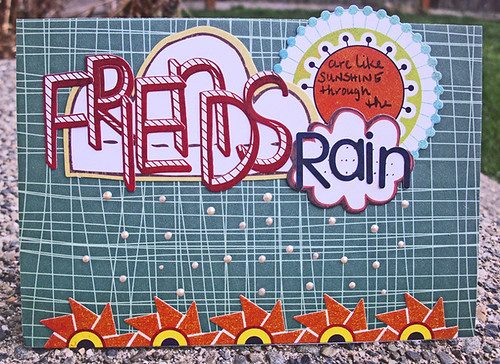
Friends are Like Sunshine Through the Rain

Friends...Like Sunshine Through the Rain, don't you agree?  In some form or other friends I've met along this journey have brought such joy to my life.  Friends I've known since I was a little girl, friends at work, friends I've met in the crafting world either in person or online....

Thank Heaven for Friends!  It's amazing the power that kind words, prayers, and simply just listening have.  Today my post is a tribute to all of my friends....including YOU reading this right now!

Thank you for taking the time to comment, read, and just bring sunshine into my life.  It means so much and keeps me creating!

(click on photos for supply lists)
Friends are Like Sunshine Through the Rain

This card is made with lots of Basic Grey and Cosmo Cricket goodness!  I used stickles for raindrops.  I LOOOOOVE me some stickles!

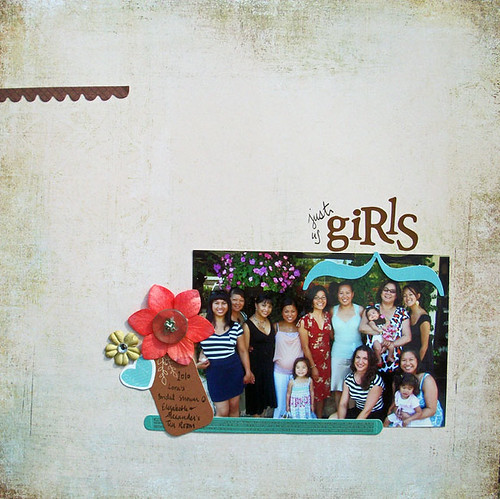
Just us Girls

And this layout is of a photo I took with a BUNCH of old friends...the oldest friends I have!  My friend Lora got married and this was her bridal shower.  Oh man, it was a HOT day, but we cooled off with some good old iced Sweetberry tea at Elizabeth and Alexander's Tea House (love that place)!

And school is in full swing at the Kao household.  I've completed the monthly and daily chore charts for the kids.  He he...the must be wondering what in the world is going on with me...I really haven't had the kids stick to schedules but my son has just started Kindergarten and I really have to get THAT ONE on a schedule if he's going to do well....lol!  Poor kid, he's so much like his momma.  If my mother and father didn't keep on me constantly, I wouldn't have been able to get anything done (too much of a daydreamer).  And since I'm AWFUL at remembering when things need to be done, schedules are a MUST!

Even the Hubby couldn't escape the chore chart!  Ha ha...now to introduce it to him....muah ha ha ha!  Do you or did you use chore charts?  Got any good websites for tips and tricks?  Please share!

(Both creations were featured in the March 2012 issue of Scrapbook News and Review Magazine.)


Tuesday, July 31, 2012

A Winner and Eye Candy!


Hi Folks!  I have a winner of the free seat to my online class Scrapbooking with Punches and Die-Cuts!  Barb Turpin, if you don't already know, you won!  Thanks so much to everyone for your interest!  Class starts August 3rd if you'd like to sign up!  You don't have to be there the first day or any of the days I actually post the class.  I'll be there for questions and feedback and for at least a couple weeks after the class  finishes up!  You will have access to the class material for an unlimited time so it doesn't go away after the class ends, it will be there hanging out for you!  :)

And because I haven't posted anything to look at for awhile, here is some creations full of love.  The first layout was created for one of my bestest buddies ever!  Oh how I love this girl!  She and her Hubby have continually inspired me to strive and work at my marriage.  For those married, it's not that easy at times, it takes lots of work!  Am I right?  These two serve as a constant reminder of how to stay thoughtful, how to understand each other, and an example of immense loyalty.  I love these two with all my heart.


My dear S and T if you're reading this, I love you guys so much!  Thank you for bringing both of those beautiful babies into this world.  I love your two rug-rats with all my heart and am so honored I am blessed with you all in my life.

I Wish You Love by Maureen Esquillo-Kao Supplies Patterned Paper: Luxe Designs, My Mind’s Eye; Overlay: Luxe Designs; Alphabet Stickers: American Crafts; Journaling Card, Tab: My Mind’s Eye; Flowers: Petaloo; Button: Nikki Sivils; Mists: Lindy’s Stamp Gang, Maya Road; Label Maker: Dymo; Other: Felt hearts, rhinestones, flowers, ribbon

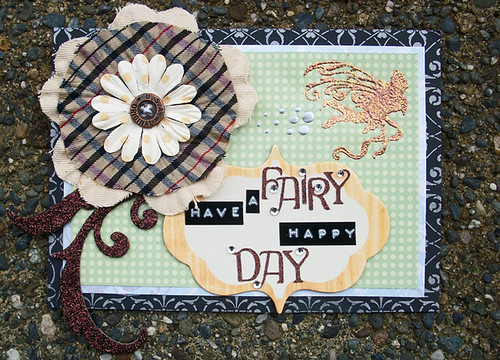
And this next card was very fun to create.  I think my favorite part is the dotting of liquid pearls behind that glittered fairly.  Such a fabulously textured card!  For supply lists of the next two creations, just click on the photos and you will be brought to my Flickr account which has supplies listed!


Fairy Happy Day


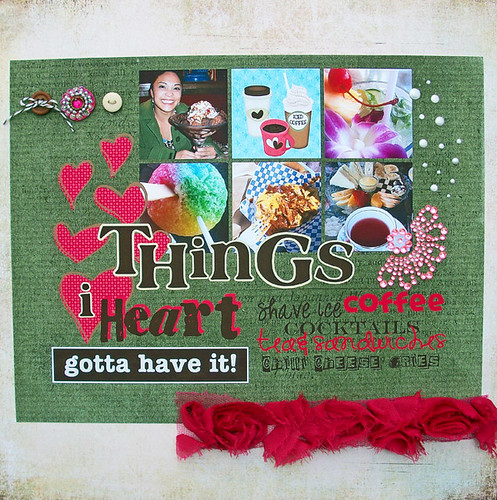
This third project is actually a hybrid layout.  Most of it is digitally created and I went in and added buttons and bling, liquid pearl smatterings and some fun flower trim!  If you don't want bulky pages, this is the way to go!  And in this day and age of skimping and saving, digital creating is a viable option.  Buy a digital kit and you can use it over and over and over.  Think of all the moolah you can save!  Create hybrid or fully digital layouts.  I'm so happy I explored Digi!

Things I Heart

All three projects were created for the March 2012 issue of Scrapbook News and Review.

Have you tried digital creating?  If you've been intrigued and haven't started learning, what's stopped you?
I hope you are all having a fabulous week.

The newest issue of Scrapbook News and Review is available!


My class is starting this Friday and I am beyond excited...but nervous as well!  Wish me luck!  Wish me more students while you're at it (wink wink)!


Thursday, September 8, 2011

2Fer!

I know, I know...it sounded more exciting than it really is! Fooled you!
But now you're here, so stay and LOOK!

Today I have two cards pubbed in Scrapbook News and Review June 2011 issue.  I can share now!


A card I made for a dear co-worker who wised up and went to a different department.
I sure miss him :)
I hand drew a woodgrain pattern on that chipboard piece and went in and added some glitter to color it in.
I love this card ;)


I had some fun with stickers on this one!  Crate Paper rocks!  I love them!
Believe it or not, my favorite part of this card are the teeny clear pebbles!  Lol! Sigh.

In recent news, the Kao Family had a wonderful week!  We tired the kiddos out with various outings that knocked them out as soon as we got back home!

We watched "Up" outdoors at a park.  Hubby had to have his gummi bears.  Too funny.

Sher, I don't know if you're reading this but...remember when he wanted to stop by the store to get a bag of gummi bears to take to the Janet Jackson concert and I was like "Um, it's not like watching a movie..."...LOL! I'm still cracking up over that!

And my smart sis brought her air mattress.  Of course, the kids left my side to sneak in between my sisters!
I love my family!

There were face painters there.  So cute!
 
And my girl decided on that dog from the movie...whatever his name was....

The funny thing was, it was a "dog park"...people let their kids run around barefoot....um...what do you think is hiding in the grass at a dog park??????  Doggy doo!  Ew.  I'm such a bi*ch I kept on watching to see if the kids would step in it because I know exactly where a bunch of doo was!  I know, don't worry, Karma will get me!  It's little devlish things like this that make me the not-so-sweet-as-I-seem person I really am!

Muah..ha ha ha!!!!


Sunday, July 31, 2011

Fun shares and a special announcement!

I hope you all are well.  As the summer wraps up, I'll be able to visit my bloggy buddies more!  So sorry for being MIA!  I'm just trying to keep my head above water at this point!

It's been a fun ride with Scrapbook News and Review and I have been expanding my talents, learning new things, and having fun creating and enjoying my scrappy time!  I've been immersed in it!

The May issue of SNR featured the following projects I now can share!  They are two of my favorite creations so far.

Birthday Memories by Maureen Esquillo-Kao Credits Digital Paper: Essentials Papers v.1 by Carina Gardner, My Dream Getaway by SKrapper Digitals, We Kit by Jessica Sprague; Word Art: SAS-y Doodles by SKrapper Digitals, Design 365 Color Kit 1 by Carina Gardner, Save The Date v.1 by iKari Designs; Stitches: Essentials Stitches v.2 by Carina Gardner, Drama Queen by SKrapper Digitals; Tape: Inspired Page Kit by SKrapper Digitals; Paperclip, Button: Drama Queen by SKrapper Digitals; Flower: Popstar by SKrapper Digitals; Brad: The New Girl in School by SKrapper Digitals; Glitter: Pink Spill Glitter by iKari Designs; Mask: Essentials Masks v.1 by Carina Gardner; Photo Effects: Instagram; Font: Carbon Type by Philip Steffen
The above digi layout might just be my most fave one.  I enjoyed creating it.  I employed lots of "stitching" into the design.  Digi has so many options I tell you!  I scrapped about my 35th birthday dinner at my favorite Korean restaurant.  My mouth is watering just thinking of it right now!

I used Instagram (on my iPhone) for the photo effects.  Yes, it's very addicting!

Next up, a card.  Lots of stamping goodness here!

Just for You by Maureen Esquillo-Kao Supplies Cardstock: Neenah; Patterned Paper: Stampin Up; Poster Board: Poster-Glo; Rhinestones: Kaisercraft, My Mind's Eye; Stamps: Stampin Up; Ink: Ranger, Stampin Up, Staz-On; Clear Embossing Powder: Hampton Art; Glitter Glue, Liquid Pearls: Ranger; Watercolor Pencils: Stampin Up; Punches: Stampin Up; Stamp Positioner: Stamp-a-ma-jig; Crop-A-Dile Corner Chomper: We R Memory Keepers; Other: Opaque embossing powders, black cardstock
I just love how your work pops off a black background.  It's so classic!
I stamped my image a few times and embossed, inked, and blinged it all out for your viewing pleasure!

And now for the EXCITING news!  This is the reason I've been MIA for soooooo stinkin' long!  Scrapbook News and Review is featuring a summer's worth of exciting creations from the SNR staffers!  You will NOT WANT TO MISS IT!  Every week, there will be at least one manufacturer showcased!
You've GOT to see the list of the manufacturers featured in PART 1!  Here, lemme throw a couple out there for you.....CRATE PAPER.....COSMO CRICKET.....

Want to hear more?  Well, lemme help you out....
check out SNR's home page for more info and return frequently to catch the lastest news!

 
Hugs,
Mo

BLOGWEAR