Showing posts with label Halloween. Show all posts

Wednesday, December 12, 2012

Photo Mat Tutorial - Halloween Style!

Hi!  Just dropping in for some fun Halloween projects.  I'm going to try and sneak another one in this week as well!  Stay tuned!  If you enjoy the project, you really should check out my Halloween class over at The Art Studio for Scrapbook News and Review!  I'll show you how to create a fun Convertible Halloween Mini Album to Banner!


Watch below for a sneak peek video!


But here's my tutorial today I'd like to share.  This was originally featured at the event Scrapbook News and Review held for SRM Stickers.  I got to play with these cool clear stickers!  I love the versatility and quality of them.  It really is different from alot of the stickers on the market.  The clear stickers are a bit more sturdy and they really melt into your project.  It helps that it's not shiny at all, more matte and that's why it blends better.  Anyway, check out my fun photo mat/frame I made!

You can add it to a scrapbook layout or pop a photo into it and hang it with some ribbon and make it a frame!


Halloween Photo Mat by Maureen Esquillo-Kao Supplies Stickers: SRM Stickers; Flower: Prima; Finely Ground Glass: Floracraft; Ink: Ranger; Top Note Die: Sizzix; Other: Chipboard

Supplies
SRM Stickers
6x6 hipboard
Die-Cut Machine
Top Note Die
Ink
Inking tool
Craft glue
Diamond dust (finely ground glass) or glitter
Glue Gun
Flower
White acrylic paint
Foam brush


Step One: Use your die-cutting machine to cut out the top note from 6x6 sized chipboard.  Use the negative piece for your frame.  Lay your frame on top of a piece of scrap paper.


 Step Two: Paint your frame with white acrylic paint using a foam brush.  Let dry.  Paint a second coat and let dry.  Note: You can speed up the drying process with a heat gun.


Step Three: Ink the outside and inside edges with your inking tool.


Step Four: Add your SRM Stickers.  I trimmed some of the stickers to fit my frame.  Leave a space for your flower.  Plan your sticker placement around where your flower will be so that the flower doesn’t cover parts of your words.  For example, I placed the sticker that says “get candy” far enough so that the flower will not cover any of the words.


 Step Five: Add glue to the inside and outside edges of your frame and sprinkle with your glass glitter.  Lightly press the glitter in some of the areas where the glitter doesn't seem to stick.  Let your frame dry.  Note: You do not want to speed up the drying with a heat gun.  The glue will bubble.


Step Six:  Add your flower using a hot glue gun.  Use for a great scrappy project!  Note: Project ideas can include a scrapbook layout, magnet frame, hanging frame, shadow box, or a large card!

Thursday, October 25, 2012

A TREAT Card! No Lie!

The day is drawing near!  That means you need to GET ON those projects you've been meaning to create for Halloween!  YES!  Remember to MAKE TIME to create!  I can really sneak up on you and I know time and time again I fully mean to make something and then the day arrives and I yell a real big "DOH!" because I forgot to make time for my projects!

My Convertible Halloween Mini Album to Banner class not only covers making a BANNER, it covers SCRAPBOOKING and creating a mini-album too.  But the fun doesn't stop there.  There are printables and techniques you can use for other non-Halloween projects!  


Here's a description of the class:  

The fun doesn’t stop there. Watch as your creation comes to life as the banner converts into a coffee table mini album. Zany, I know! But zany is as zany does. Take advantage of my crafty, mad scientist mind and get ready for an adventure. In this class, you’ll learn how to create a Halloween banner with photographs and if you’re not big on photos, I’ll show you how to use fun images from Halloween themed patterned paper instead. Your banner can be any length, and its design will allow you to add an additional page for each new year...and another...and another. Many of the ideas and techniques I developed for this class are applicable to various themes, occasions and crafting projects. You can use them over and over until your heart’s content. My fun-loving personality infuses this class with innovative and trendy ideas to keep you in vogue when it comes to paper crafting. Treat your crafty hands to some cute flower making techniques, clothespin decorating, mummy doll making, spooky fence crafting, spider web weaving, fun pocket folding, tag constructing and mini frame embellishing – all wrapped in one jam packed Halloween themed class.  You’ll also employ misting, glittering, embossing, painting and maybe even some dancing while you’re creating your Halloween banner. I’ve also got a surprise or two hiding in the class for you. If you’ve got fun photos or a stash of spooky Halloween paper, then don’t wait for the holiday to arrive, buy the class and start today!

Here's a sneak peek video of what you'll learn in the class....


Want more Halloween fun?  Here is a card I've create for a very special little lady.  She'll be getting this in the mail with some treats and some non-candy goodies.  This Trick or Treat card features a couple design ideas I cover in the class.  My favorite is the pocket template I used.  It really takes center stage on this project.  Just print the template onto some cardstock, cut it out, fold it and add some glue!  This pocket template is part of my Halloween Mini-Album to Banner class.  You can continue to use the design techniques in other projects (even non-Halloween ones)! Too cute!


Photobucket
Trick or Treat Card by Mo Esquillo Kao Supplies Patterned Paper: Fancy Pants Designs, K&Co.; Ink: Ranger; Crackle Accents: Ranger; Black Acrylic Paint: Plaid; Other: Cardstock, baking cup, candy, felt sticker, die-cut, yarn; Note: The pocket was created using a pocket template included in my Convertible Halloween Banner to Mini-Album Class.

Photobucket

Here I covered a die-cut greeting with some crackle accents by Ranger.  Gosh that stuff is fun to use!

Andrea and Shaylenne also have classes available so check them out!


Andrea's Bootiful Creations class features Halloween-inspired flowers!  Just think of the fabulous projects you can make!  I adore flowers in my projects...they just seem to make them ZING!

For another fun tutorial check out this Halloween Frame tutorial!


Pin It

Thursday, October 4, 2012

This is Halloween....


Ahhhh....my favorite time of the year.  Dare I say, even more exciting than Christmas!  We're pulling out the Halloween decor.  And the kids are chompin' at the bit to get their little hands on the fun Halloween booties to help with the decorating!

And it's been awhile since my last post because I've been slaving on my new Halloween-themed class to offer at The Art Studio!  Soon it will be up and available....hopefully by Saturday.  But until then, here are some sneaks....


Now I don't know how the idea came about but I somehow got it in my head that I wanted to make a class where you can create a Halloween banner to hang or you mantle, doorway, or wall.  But I couldn't leave it at that...oh NO I couldn't and so I'm going to show you how to morph it into a mini-album to display after Halloween has graced us with it's spooky presence!


Take advantage of my digi skills and benefit from the fabulous downloadable patterned paper, journaling library cards with pocket, and journaling tag!  Oh and the fun doesn't stop there.....gosh....kinda sorta feels like Christmas, doesn't it????

Well, when the class debuts for sale (it's self-paced so you get it instantly when you buy...no waiting till class is in session), I will have FOR FREE a small tutorial to share via video on The Art Studio website.  I'm even contemplating a FREE printable as well!  So come by, sample some fun and if you likey....BUY-ee!

And to celebrate some Halloween fun I've got some Halloween projects created last year for the EK Success event we held on the Scrapbook News and Review forum!  I'm gonna keep some of them from you  to share later but this is what I've got for your viewing pleasure today!


Want a little sneak of some ideas on my Scrapbooking with Punches and Die-Cuts class?  Well, her ya go RIGHT HERE!  I'll be releasing this class soon available as a bundle or separately by shape (circles, squares, and hearts...oh my)!  Ahem, the best buy is the BUNDLE!  So watch the video now, because I'm thinking of editing it down because it really is a bonus for those who purchase the entire bundle.  I think I'm going to take out some of that content REAL SOON!  LOL!

So stay tuned!  I hope you are all happily busy with life and crafting!  And if not, just happy!  Thanks for stopping by to visit!


Tuesday, November 10, 2009

Hello.......are you there? I'm back!

Oh my friends! So sorry I've been MIA! But we've been having lots of family fun and taking LOTS of photos! So...I've got a bunch to share! I was working on the MOTW post...but decided to save it....I've got a special feature next Monday that will MAKE YOU DROOL! Ha ha! So, I'd like to put off the current MOTW post I'm working on and will start the one for Monday NOW so I can come up with some fantastic clips and photos for your veiwing pleasure...AND MINE! Have I teased you enough? I'm not going to give anymore hints...but will say that I DON'T THINK YOU WILL BE DISAPPOINTED!

So, with the Fall...comes lots of busy things for our family. I've got two RugRat birthdays to plan and Fall activities to do and enjoy and so that's taken away from my blogging! I've missed your blogs...but will visit in bits and pieces as I have a chance! So a big sorry to all my friends for neglecting you!!!! But Mo is VERY GOOD at comebacks!

I've been editing TONS of Halloween photos and have a few to share! The kids had lots of fun. Isabel wished she got a few more houses in...but poor girl got stuck with trick-or-treating with the babies/toddlers this year. My cousins ended up somewhere else and we chose to go to a party at my BIL's house.

Gabe trudged around in his FIDO-FIDO boots (firefighter). Oh my! My son is a Diva just like my Dad (Yes, really!). He's so high-maintenance! Let me give you some background info first. We started out about a month and a half ago with an awesome costume from The Disney Store...a racecar driver suit with matching sneakers in the theme of Cars. Cool huh? Great quality costume. Anyway...brought that home all excited to see Gabe's face light up...and all I got was a frown! "Hmph....I dohlike Cows (Cars)...I like Pidohmeeahn (Spiderman)." So, after some begging from my Mom, I said okay, we'll take back the Cars and get Spiderman. So I did! He gets excited until we put it on...and he decides he doesn't like the mask! Ugh! And in the meantime, he watched a Caillou (cartoon) episode where a firefighter saves a cat from a tree...so NOW he want's to be a FIDO-FIDO. Ssssssiiiiiigh..... Again, my Mom begs me if she can buy him the costume he wants...after much thinking, I agree and Mom finds a costume after looking at a couple stores (since costumes are scarce 2 days before Halloween). She pays $40 for a costume. She shows it to him and puts it on him and he FROWNS again! "I no like brown, I like PINK FIDO-FIDO!" Which we realize...is really red. Anyway, in the end he reluctantly wore the costume...and so had a grumpy face the whole night long! WELCOME TERRIBLE THREES! Yikes! He's a handful!


I'm always worried he's gonna run into the street...so I remembered to bring along my baby leash!  Luckily, he didn't fight it!  But by the 3rd house he was dragging and asking that I carry him.  My mistake...I forgot to put him down for a nap earlier in the day!  Soooooo......I tell one of our family friends to please watch over my Kitty Kat and the Vampire and the Fido-Fido head back.


And my sweet girl chose this cute Black Cat costume...she LOVED it!  She wanted a mask (um...it was a $5 hunk of plastic) so I told her I would paint some whiskers on her and put some eyeshadow and lipgloss too...SOLD!  She chose purple eyeshadow and I also sprayed some purple hair coloring on her (leftover from last year).  She looked awesome!


Yes...THATS THE ROBOT...he he!  I love watching her dance!  We all do!


And here's cutey Diva P!  I love those cheeks!


Soooooo cute!


Big D, my SIL, was a housewife...with rollers in her hair, funny makeup and a bathrobe...ha ha!


Even Diego looked too cute!  He was FREAKED OUT by this costume and wouldn't walk around on his own.  We had to tote him around!


My sis Emmy flew in from Cali...she was some dead bride or something....creepy!

Krystal was smart enough not to have a costume on so I couldn't embarrass her with photos on the blog!

I played arond with some old clip-on hair extensions I had.  I love this picture of Bel and I!

Here she is posing on the stairs.

And here's another photo I love!

Bel took some pics with the camera so that Mommy had some of herself!

This one's kind cool!  He he!


Here's my little Kitty Kat!


She's so cute!

Hope you are all doing well!  I've got more pictures from other things going on in the last couple weeks!  Are you ready for Thanksgiving?  What are you planning to do that day?

Hugs,
Mo

Saturday, October 31, 2009

Day of the Dead

Also called, El Dia de los Muertos  or All Souls' Day.  It's a Holiday celebrated in Mexico and by Latin Americans living in U.S. and Canada.  Family and Friends gather to pray and remember those who have passed.  The Catholic Holiday is termed All Souls' Day and is celebrated on November 1st and 2nd.  Traditionally, altars are built to honor the dead and may incorporate favorite foods, beverages and flowers.  Gifts are brought to the graves of the deceased.  (Information taken from Wikipedia.  BTW, I feel like I"m in college writing a report and quoting a source!)

I wanted to share this beautiful altar my sister Emmy made in honor of our late Grandmother.  When Emmy told me she was creating this, I was sooooo excited!  But I tried to imagine what it would look like, and all I could think of was a LOT of black and skulls and was wondering....hmmmm...kinda creepy!


And she sent me the photo and I was soooo pleasantly surprised at the bright and cherry look!  I LOVE IT!  I've shared how close I was to my Grandmother.  We had a very special connection.  But so did Emmy.  When I look at my sister, I am reminded of my Grandmother...her strength and beauty...her feistiness.

Here's Emmy's description of the piece:
"I put lots of buttons and the spool of thread and thimble to represent Grandma Idad's work as a seamstress.  The fruit is a traditional part of Day of the Dead (DOTD).  In Mexico they put out food and candies called "ofrendas" as a gesture for the deceased.  Since Grandma was such a religous person, I put angel wings on the front and the Virgin Mary on the back." 


Oh! And I've got a story for you!  In the picture of my Grandmother you can see a Christmas Tree in the background.  It was made out of ribbon.  My father made it!  I think I was about 17 when we visited Hawaii for Christmas.  We got there right before Christmas and my parents went looking for a tree.  Well, being Hawaii, they do not have an abundace of trees on the corner....NOPE....ALL OUT!  So my father's brains started thinking...and planning.  He ran to the store and came back with a bag of green ribbon, garland and tape!  He strung some ribbon from the ceiling and created that tree.  I started cutting snowflakes out of white computer paper in various sizes and we trimmed the tree with them!

To this day, THAT was the only tree I can really remember.  It was my favorite tree and the only one which held such importance and meaning.  That Christmas I remember my Grandmother....our last Christmas with her...and that beautiful tree.  Without meaning to or even realizing it, my father created a beautiful touching memory and I'm so thankful for his efforts.

And I also relaize that I did not get the crafty gene from my mother...which I suspected...it's from Dad!

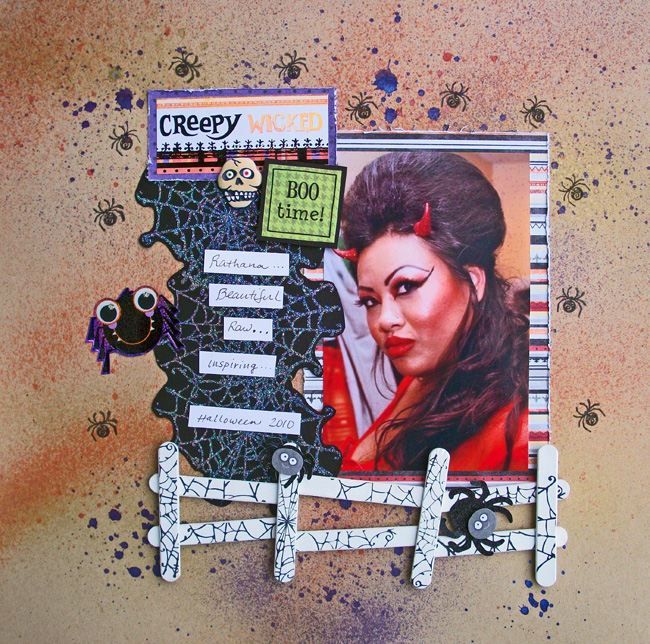
Here's another shrine my sister made last year.  It's more dark and Halloweeny!  FUN!


And here's the back side of the shrine.  I love that blue!

My family is from the Philippines, so this holiday is familiar to me.  Here is some information taken from Wikipedia:
"In the Philippines, the holiday is Araw ng mga Patay (Day of the Dead), Todos Los Santos or Undas (the latter two due to the fact that this holiday is celebrated on November 1, All Saints Day), and has more of a "family reunion" atmosphere.  Tombs are cleaned or repainted, candles are lit, and flowers are offered. Entire families camp in cemeteries, and sometimes spend a night or two near their relatives' tombs. Card games, eating, drinking, singing and dancing are common activities in the cemetery. It is considered a very important holiday by many Filipinos (after Christmas and Holy Week), and additional days are normally given as special non-working holidays (but only November 1 is a regular holiday)."

When I was a child, I didn't quite understand the whole celebrating in a cemetary thing and was kinda horrified when my Mother told me about how they don't Trick-or-Treat!  It's so  intereresting how the day can be filled with fun, joy, celebration, loss, grief and sorrow all at the same time.  I think of it all as a celebration of life and a Thank You to God for sending us the soul of our loved ones...if only for a brief time on Earth.

So there you have it!  Not the kind of Halloween post you were expecting, right?  Well, you got a little bit of a culture and history lesson instead!  Hope you enjoyed

 Have a fun and safe Halloween!

And Grandma....I MISS YOU!

Hugs,
Mo

BLOGWEAR