Watch below for a sneak peek video!
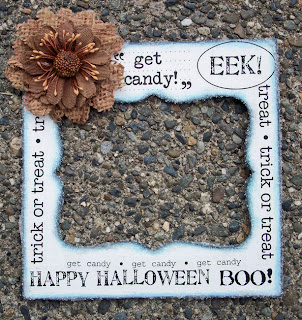
But here's my tutorial today I'd like to share. This was originally featured at the event Scrapbook News and Review held for SRM Stickers. I got to play with these cool clear stickers! I love the versatility and quality of them. It really is different from alot of the stickers on the market. The clear stickers are a bit more sturdy and they really melt into your project. It helps that it's not shiny at all, more matte and that's why it blends better. Anyway, check out my fun photo mat/frame I made!
You can add it to a scrapbook layout or pop a photo into it and hang it with some ribbon and make it a frame!
Halloween Photo Mat by Maureen Esquillo-Kao Supplies
Stickers: SRM Stickers; Flower: Prima; Finely Ground Glass: Floracraft; Ink:
Ranger; Top Note Die: Sizzix; Other: Chipboard
Supplies
SRM Stickers
6x6 hipboard
Die-Cut Machine
Top Note Die
Ink
Inking tool
Craft glue
Diamond dust (finely ground glass) or glitter
Glue Gun
Flower
White acrylic paint
Foam brush
Step One: Use your die-cutting machine to cut out the top
note from 6x6 sized chipboard. Use the
negative piece for your frame. Lay your
frame on top of a piece of scrap paper.
Step Three: Ink the outside and inside edges with your
inking tool.
Step Four: Add your SRM Stickers. I trimmed some of the stickers to fit my
frame. Leave a space for your
flower. Plan your sticker placement
around where your flower will be so that the flower doesn’t cover parts of your
words. For example, I placed the sticker
that says “get candy” far enough so that the flower will not cover any of the
words.
Step Six: Add your flower using a hot glue gun. Use for a great scrappy project! Note: Project ideas can include a scrapbook
layout, magnet frame, hanging frame, shadow box, or a large card!


This is soooooooooo fun!! LOVING it!!!!!
ReplyDelete