
.jpg) Once again, I had a BLAST participating in the Creative Cafe at Vintage Plum this past Tuesday! (CLICK HERE FOR THE TUTORIAL ON CC). Beth hosted CC and posted a tutorial on how she altered a vintage book! Miss Beth is so CRAZY TALENTED! (Click on that last link to learn more about my wonderful friend!)
Once again, I had a BLAST participating in the Creative Cafe at Vintage Plum this past Tuesday! (CLICK HERE FOR THE TUTORIAL ON CC). Beth hosted CC and posted a tutorial on how she altered a vintage book! Miss Beth is so CRAZY TALENTED! (Click on that last link to learn more about my wonderful friend!)I am soooooo happy with what I created! For the longest time I've been waiting to find a way to showcase some of my early childhood family photos. Then, Vintage Plum put together the April Kit called Hopscotch and I KNEW I had some wonderful materials to use! Then....Beth showed us some CRAZY vintage books she made a few weeks ago and I went BALLISTIC!
I have to say that I've learned few things about my scrap booking style these past couple of months being addicted to Vintage Plum! I've expanded my talents and learned so much! Thanks to all the VP Homies!!!!!! Woot woot!
Here's my book!.jpg) I grabbed everything vintagy I had and laid it around the table and just let the MoJo flow! I loved these papers from the Hopscotch kit....the colors reminded me so much of Hawaii! I'm soooo happy!
I grabbed everything vintagy I had and laid it around the table and just let the MoJo flow! I loved these papers from the Hopscotch kit....the colors reminded me so much of Hawaii! I'm soooo happy!
.jpg) And then my two-year-old son was running around with this little red fabric flower he pulled off one of my fake plants....I grabbed him and said "Can I have that?".....thank goodness he didn't pitch a fit...he handed it right over! It looks wonderful with the paper!
And then my two-year-old son was running around with this little red fabric flower he pulled off one of my fake plants....I grabbed him and said "Can I have that?".....thank goodness he didn't pitch a fit...he handed it right over! It looks wonderful with the paper!
.jpg) I love that turquoise color! And the font on the rub ons (another yummy part of the Hopscotch Kit) are sooooo perfect!
I love that turquoise color! And the font on the rub ons (another yummy part of the Hopscotch Kit) are sooooo perfect!
.jpg) I grabbed my bag of ribbon scraps and went WACKY! The messier the ribbon looked...the better it worked! And I found that cute fabric heart in that stash. I actually saved it....it was part of he tag from a baby outfit that was given to my son! Isn't it so adorable! I knew I'd find a good way to use it in my crafting!
I grabbed my bag of ribbon scraps and went WACKY! The messier the ribbon looked...the better it worked! And I found that cute fabric heart in that stash. I actually saved it....it was part of he tag from a baby outfit that was given to my son! Isn't it so adorable! I knew I'd find a good way to use it in my crafting!
.jpg) Here's a side view so you can see the tags and hanging-outy thingys that peek out from my book! I love that look. It's so here-and-there-and-everywhere....just like my brain! (Don't believe me? Ask my friends and family!)
Here's a side view so you can see the tags and hanging-outy thingys that peek out from my book! I love that look. It's so here-and-there-and-everywhere....just like my brain! (Don't believe me? Ask my friends and family!)
.jpg) And to be totally honest.....I wasn't sure about the whole doily thing in the VP Kit...but MAN did it look good on this book! I went from anti-doily to DOILY FREAK! I need more doilys!
And to be totally honest.....I wasn't sure about the whole doily thing in the VP Kit...but MAN did it look good on this book! I went from anti-doily to DOILY FREAK! I need more doilys!
 Look at that red flower....it's like it's just lookin' at you and smiling!
.jpg) So I got a good start on this...it's not done. I just started few pages. It's gonna take a bit because I have to scan my photos first (I can't cut up the originals!). I'm so glad I got a printer/scanner last year!
So I got a good start on this...it's not done. I just started few pages. It's gonna take a bit because I have to scan my photos first (I can't cut up the originals!). I'm so glad I got a printer/scanner last year!
.jpg) Here's my first page. I love this stamp! It's by Provo Craft and it's a rolling journaling stamp called CIRCA. I will be using this lots in my vintage book!
Here's my first page. I love this stamp! It's by Provo Craft and it's a rolling journaling stamp called CIRCA. I will be using this lots in my vintage book!
.jpg) I broke into my big button jar....yay! I'm using up all kinds of stuff! Here I am just chillin' and relaxin'.....yes, they made swings back then (1977)! Look....it's made of aluminum!!!! He he.
I broke into my big button jar....yay! I'm using up all kinds of stuff! Here I am just chillin' and relaxin'.....yes, they made swings back then (1977)! Look....it's made of aluminum!!!! He he.
.jpg)
The little birdy was made with my trusty Big Shot (It's the Birds and Blooms Sizzlits Die)! Order from Stampin' Up! If you don't already have a SU Demonstrator....order from ME ME ME! The black and white paper is part of a journaling book by Making Memories called 5th Avenue.
I grabbed everything vintagy I had and laid it around the table and just let the MoJo flow! I loved these papers from the Hopscotch kit....the colors reminded me so much of Hawaii! I'm soooo happy!.jpg) And then my two-year-old son was running around with this little red fabric flower he pulled off one of my fake plants....I grabbed him and said "Can I have that?".....thank goodness he didn't pitch a fit...he handed it right over! It looks wonderful with the paper!
And then my two-year-old son was running around with this little red fabric flower he pulled off one of my fake plants....I grabbed him and said "Can I have that?".....thank goodness he didn't pitch a fit...he handed it right over! It looks wonderful with the paper!.jpg) I love that turquoise color! And the font on the rub ons (another yummy part of the Hopscotch Kit) are sooooo perfect!
I love that turquoise color! And the font on the rub ons (another yummy part of the Hopscotch Kit) are sooooo perfect!.jpg) I grabbed my bag of ribbon scraps and went WACKY! The messier the ribbon looked...the better it worked! And I found that cute fabric heart in that stash. I actually saved it....it was part of he tag from a baby outfit that was given to my son! Isn't it so adorable! I knew I'd find a good way to use it in my crafting!
I grabbed my bag of ribbon scraps and went WACKY! The messier the ribbon looked...the better it worked! And I found that cute fabric heart in that stash. I actually saved it....it was part of he tag from a baby outfit that was given to my son! Isn't it so adorable! I knew I'd find a good way to use it in my crafting!.jpg) Here's a side view so you can see the tags and hanging-outy thingys that peek out from my book! I love that look. It's so here-and-there-and-everywhere....just like my brain! (Don't believe me? Ask my friends and family!)
Here's a side view so you can see the tags and hanging-outy thingys that peek out from my book! I love that look. It's so here-and-there-and-everywhere....just like my brain! (Don't believe me? Ask my friends and family!) .jpg) And to be totally honest.....I wasn't sure about the whole doily thing in the VP Kit...but MAN did it look good on this book! I went from anti-doily to DOILY FREAK! I need more doilys!
And to be totally honest.....I wasn't sure about the whole doily thing in the VP Kit...but MAN did it look good on this book! I went from anti-doily to DOILY FREAK! I need more doilys!My booky book...you're looking so beautiful! Beth! She looks so beautiful, doesn't she?????? (he he he)
I couldn't stop snapping pictures of this book! I can't wait for my sisters to see it in person! My mom saw it and thought it was wonderful!
I couldn't stop snapping pictures of this book! I can't wait for my sisters to see it in person! My mom saw it and thought it was wonderful!
 Look at that red flower....it's like it's just lookin' at you and smiling!
.jpg) So I got a good start on this...it's not done. I just started few pages. It's gonna take a bit because I have to scan my photos first (I can't cut up the originals!). I'm so glad I got a printer/scanner last year!
So I got a good start on this...it's not done. I just started few pages. It's gonna take a bit because I have to scan my photos first (I can't cut up the originals!). I'm so glad I got a printer/scanner last year!.jpg) Here's my first page. I love this stamp! It's by Provo Craft and it's a rolling journaling stamp called CIRCA. I will be using this lots in my vintage book!
Here's my first page. I love this stamp! It's by Provo Craft and it's a rolling journaling stamp called CIRCA. I will be using this lots in my vintage book!About the photo: For the first 3 years of my life we lived in Guam (Dad was in the Navy. GO NAVY!). Then we moved to Hawaii. Yes, my dad's first car was a VW bug!
.jpg) I broke into my big button jar....yay! I'm using up all kinds of stuff! Here I am just chillin' and relaxin'.....yes, they made swings back then (1977)! Look....it's made of aluminum!!!! He he.
I broke into my big button jar....yay! I'm using up all kinds of stuff! Here I am just chillin' and relaxin'.....yes, they made swings back then (1977)! Look....it's made of aluminum!!!! He he..jpg)
The little birdy was made with my trusty Big Shot (It's the Birds and Blooms Sizzlits Die)! Order from Stampin' Up! If you don't already have a SU Demonstrator....order from ME ME ME! The black and white paper is part of a journaling book by Making Memories called 5th Avenue.
I asked my dad why they didn't smile in these old photos....he said they hadn't invented smiling in photos yet.....(he's a smart a**)! I never got a straight answer.
.jpg) Here's a couple pages I started. I used another journaling page from my MM 5th Avenue spiral notebook. That beautiful strip of orange patterned paper is part of the March VP Kit "Hill Country" (can't remember the manufacturer).
Here's a couple pages I started. I used another journaling page from my MM 5th Avenue spiral notebook. That beautiful strip of orange patterned paper is part of the March VP Kit "Hill Country" (can't remember the manufacturer).

.jpg) Here's a couple pages I started. I used another journaling page from my MM 5th Avenue spiral notebook. That beautiful strip of orange patterned paper is part of the March VP Kit "Hill Country" (can't remember the manufacturer).
Here's a couple pages I started. I used another journaling page from my MM 5th Avenue spiral notebook. That beautiful strip of orange patterned paper is part of the March VP Kit "Hill Country" (can't remember the manufacturer). Hope you liked the pics! I'll show you guys the pages as I complete them! This was tons of fun! Creative Cafe is on Tuesday at Vintage Plum (here are all the projects so far)! Can't be there on Tuesdays? The tutorials are posted and so you can do them later on your own time! Post your creations to the gallery! Want to peek at the other vintage books? CLICK HERE! Check back often to see new photos!
Okay your link lovers! I'm officially link overloaded AND I've got carpal tunnel! I'm done! See you soon!

 There were tons of shops...but one of my favorites is this lovely candy shop called Spreckels, Sweets & Treats! The ladies there were sooooo nice and the shop was just a feast for the eyes! My photos below just do not do it justice. For one, I'm still learning some photography skills, and two....my camera has been dropped one too many times!


.jpg) First off, lemme just say...I FINALLY got
First off, lemme just say...I FINALLY got .jpg) is TWO-FACED! Yes! You flip it over...and you get this other side!
is TWO-FACED! Yes! You flip it over...and you get this other side!.jpg)
 I got the idea of adding a charm from this YouTube video with Dawn (she's so sweet)! Here's the video below:
.jpg)

.jpg)
.jpg)


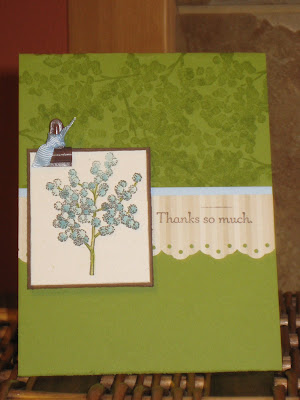

 As you can see from my photo, I messed up a little with the stamping...but that's okay. I'll just have to recreate the card when I order this stamp!!!! I'm getting the Eyelet Border punch too! I can't stand it anymore...I HAVE TO HAVE THEM!


 Well, that was fun. I will have to put up a slideshow of all the beautiful cards I had the opportunity to see! Enjoy my explosion of sharing while it lasts...I have at least enough for 5 blog posts! I just need to find the time to post!


