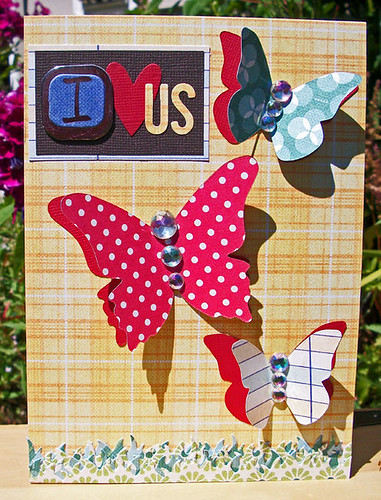
Here is another card I created using We R Memory Keepers cardstock and stickers. This was a tutorial created for Scrapbook News and Review Magazine. I added pops of red behind each butterfly for added texture and depth. All the interesting embellishments on this card were created using die-cuts and my trusty Sizzix Big Shot!
Create a card full of texture, dimension and visual appeal
using butterfly shapes and lots of patterns.
This design employs lots of die-cutting, punching and pasting. Very easy!
Supplies
We R Memory Keepers patterned cardstock
We R Memory Keepers patterned cardstock
Red textured cardstock
Brown textured cardstock
We R Memory Keepers stickers
Rhinestones
Grass die
Butterfly die
Heart punch
Alphabet die
Die-cutting machine
Glue
Glue
Step One: Die-cut
four grass strips out of two different patterned papers (two of each
pattern). You can use a grass die,
punch, or even hand cut your own grass strip.
Layer the four strips, gluing the straight edge of each strip down
individually.
Step Two: Glue the
red die-cut flowers onto your card as shown.
Step Three: Add a
strip of glue down the middle of each butterfly.
Step Four: Layer each
patterned die-cut butterfly on each solid butterfly.
Step Five: Add 3 rhinestones to the middle of each butterfly to create a body, then fold up the wings so that they pop off your card.
Step Six: Finish off
your card by layering solid brown cardstock onto patterned cardstock. Then, add the sticker, punched heart, and
die-cut letters to complete the greeting and adhere to your card.
Hope you enjoyed this tutorial!


This is beautiful! LOVING the butterflies!!!
ReplyDelete