Showing posts with label flowers. Show all posts

Wednesday, May 8, 2013

Using Metal Embellishments to Create a Journaling Block on Your Scrapbook Pages

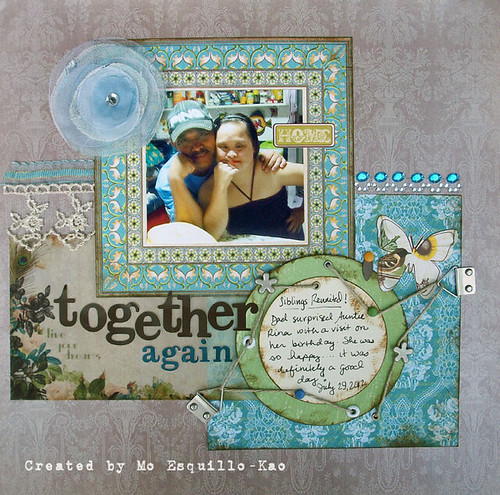
Together Again

Hardware Hodgepodge
Create an eye-catching journaling circle simply by raiding your stash of hardware!  See how I mix various photo hangers, brads, eyelets, flower brads, and photo holders to create a scrapbook page you can’t help but run your hands over!

Supplies:
Patterned paper in greens, blues, and browns
Vellum accent paper
Circle punches or circle cutter (two sizes)
Hardware: photo hangers, brads, eyelets, flower brads, photo holders
Stickers
Lace trim and ribbon
Fabric flower
Alphabet stickers
Hemp twine
Glue
Gem border trim
Brown ink
Crop-A-Dile
Paper piercer
Tape


Step One:  Arrange a grouping of patterned paper squares.  Cut or punch two circles.  Ink the edges of all the elements including the circles.  Glue together the bottom square and rectangle papers but do not glue any of these papers to the base patterned cardstock of the scrapbook page.  Glue together the circles but do not glue the circle down to the papers yet.


Step Two:  Arrange some brads, eyelets, photo hangers and a photo holder in varying areas around the journaling circle.  You will be stringing a piece of hemp twine through and around these pieces.  I am also adding a couple photo hangers to the outside edges of the patterned paper cluster.

Step Three:  Use a pencil to mark where the holes for the brads and eyelets will be placed. 


Step Four:  Use a Crop-A-Dile and a paper piercer to create holes into which you will anchor your metal pieces to.


Step Five:  Start the hemp twine in one of the eyelets.  Secure the twine to the back of the journaling circle with tape.

Step Seven:  Finish threading and winding the twine through the rest of the metal pieces.  

Step Eight:  Thread the twine through the first eyelet again to complete the design.

Step Nine:  Cut off the excess twine and secure to the back of the journaling circle with more tape.  Your fancy fun journaling circle is all jazzed up!

I hope you enjoyed that tutorial!  If you want to see more scrapbooking or cardmaking tutorials on my YouTube Channel, just comment here or send me an email letting me know what you want to see or learn!

Hugs!
Mo


Saturday, December 15, 2012

Crazy Aloha to You!

Oh how I miss summertime on wet and cold months like these in December!  I love the season but I miss the sunshine.  I've got a couple cards to share today that were really simple to make.  I dug deep in my old stash on this first card...

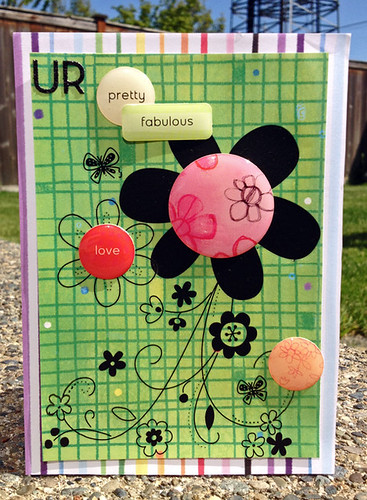
U R Pretty Fabulous

I used lots of papers and epoxy stickers here.  I had some REALLY OLD Stampin' Up! rub-ons and decided to use those on this card.  I like how it's got a sort of doodled effect to it.  The epoxy stickers added lots of fun shine and texture and also helped me create a greeting on the card.  Easy peasy!

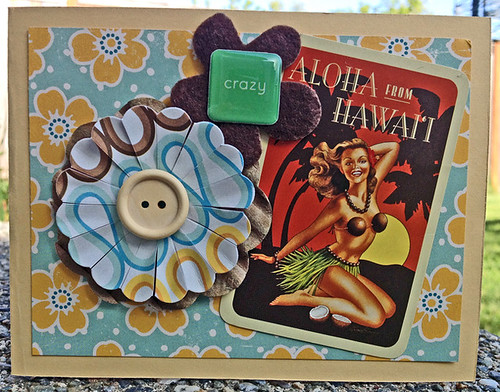
Crazy Aloha

And more stash items here.  The flower was created with a fabulous die from My Favorite Things...it really is one of my favorite things to use!  While on a trip to Hawaii, I purchased a deck of cards.  I still have a few of those laying around so if you REALLY wanted one, let me know.  I sold a few of them on my Etsy site for a good deal!

I am really seriously going through my stash of cards.  I've given lots away this year and my collection is dwindling!  I need to sit down and make a bunch!  What else am I going to share with you all?

Hope you're having a fabulous week!  Happy Holidays!!!


Sunday, November 25, 2012

uR Priceless: A Doodled Effect/Stamped Background Card Tutorial

Let me start with some amazing deals!  I can't believe how packed this issue is!  I've recently posted a few  projects on my Facebook page inspired by tutorials from this issue as well as past issues.  I'm someone who lives and breathes scrappy happiness, and I tell you YOU CAN'T EVER know everything!   Be inspired by countless projects and tutorials in this issue and 2013 will bring fabulous inspirational themes and tutorials (just wait and see).  Ahem...I have a few tutorials in here too...


ready to hear the news?????

***
Between now and Monday night (November 26, 2012 at 11:59 pm), purchase a Lifetime subscription (of Scrapbook News and Review) at the deeply discounted price of $39.99 for yourself and we'll give a free Lifetime subscription to the person of your choice and send the proceeds to those who have lost so much this holiday season from Hurricane Sandy. 

Purchase the Lifetime subscription here and then drop us a note at helpdesk@scrapbooknewsandreview.com with the name and e-mail address of the person you want to gift the subscription to and we'll do the rest!

P.S. If you already have a subscription, then grab a subscription for a friend and we'll give another friend a free subscription and then pass on the proceeds to charity.  


You can also SEE THE MAGAZINE FOR FREE until Monday night (as referenced above).  Just go HERE (subscription page) and use promo code FREESNR12.
***

Here's another tutorial I'm sharing, previously published in Scrapbook News and Review's July 2012 issue.  If you haven't realized it by now, I try to stretch my scrappy supplies by using stamps in various ways.  Doodles are fun and popular right now.  If you don't feel confident in your doodling skills, try using a doodled image stamp(s) to create a patterned paper.  Here I've added pops of color to the stamped images, completing my card with felt flowers, chipboard, twine, and brads from my stash.
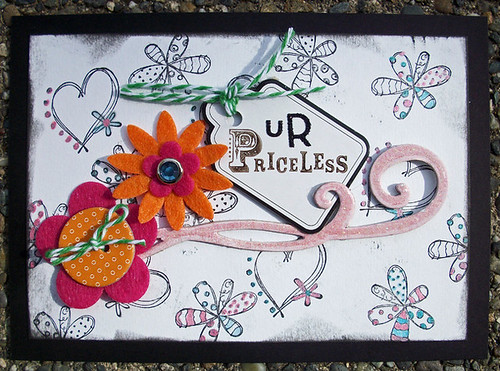
U R Priceless
(click on photo above for a supply list)


Supplies
Black cardstock
White cardstock
Small alphabet stickers
Felt flowers
Brad
Chipboard button
Bakers twine
Chipboard swirl
Chipboard tag
Outline stamps
Sentiment or word stamp
Pearlized ink (Smooches) or any colored pens/pencils
Black ink
Solvent ink (if using glossy/smooth finished chipboard tag)
Hot glue gun (or other strong adhesive)
Paper trimmer


Step One:  You will want to use a couple stamps with an outlined image you can color in.  I used two stamps and some black ink.  You can use one or more stamps to stamp a background onto some white cardstock.  Stamp some images off the edge of the cardstock.


Step Two:  Ink the edges of the white cardstock with black ink.


Step Three:  Glue the white cardstock onto some black cardstock so that you have a black border around the stamped background.


Step Four:  My chipboard tag has a glossy finish to it.  In order to stamp my word stamp onto the tag, I need to use Solvent Ink so that the ink doesn’t smear.  If your tag doesn’t have a smooth finish, you can use the same ink you used to stamp your background.


Step Five:  Color in the stamped outlined images with colored inks.  I used Pearlized inks by Smooches (Clearsnap).  You could also use colored pens or pencils.


 Step Six:  Add some baker’s twine to the chipboard tag.  Put together your felt flowers with brads or chipboard buttons and some twine.  I like to use a hot glue gun to glue the flowers together.


Step Seven:  Use a hot glue gun (or other strong adhesive) to glue your chipboard swirl onto your card.  


 Step Seven:  Use a hot glue gun (or other strong adhesive) to glue your chipboard swirl onto your card. 


Step Nine:  Add the felt flowers to the card with the hot glue gun.


Step Ten:  I added some alphabet stickers (“u” and “r”) above the word “priceless”.


Step Eleven:  If needed, trim the twine on the tag and the flower.


Don't forget to hop over to SNR and get in on those great deals!  You have till Monday November 26th at 11:59 pm...so HURRY!

Happy Crafting!


Thursday, October 25, 2012

A TREAT Card! No Lie!

The day is drawing near!  That means you need to GET ON those projects you've been meaning to create for Halloween!  YES!  Remember to MAKE TIME to create!  I can really sneak up on you and I know time and time again I fully mean to make something and then the day arrives and I yell a real big "DOH!" because I forgot to make time for my projects!

My Convertible Halloween Mini Album to Banner class not only covers making a BANNER, it covers SCRAPBOOKING and creating a mini-album too.  But the fun doesn't stop there.  There are printables and techniques you can use for other non-Halloween projects!  


Here's a description of the class:  

The fun doesn’t stop there. Watch as your creation comes to life as the banner converts into a coffee table mini album. Zany, I know! But zany is as zany does. Take advantage of my crafty, mad scientist mind and get ready for an adventure. In this class, you’ll learn how to create a Halloween banner with photographs and if you’re not big on photos, I’ll show you how to use fun images from Halloween themed patterned paper instead. Your banner can be any length, and its design will allow you to add an additional page for each new year...and another...and another. Many of the ideas and techniques I developed for this class are applicable to various themes, occasions and crafting projects. You can use them over and over until your heart’s content. My fun-loving personality infuses this class with innovative and trendy ideas to keep you in vogue when it comes to paper crafting. Treat your crafty hands to some cute flower making techniques, clothespin decorating, mummy doll making, spooky fence crafting, spider web weaving, fun pocket folding, tag constructing and mini frame embellishing – all wrapped in one jam packed Halloween themed class.  You’ll also employ misting, glittering, embossing, painting and maybe even some dancing while you’re creating your Halloween banner. I’ve also got a surprise or two hiding in the class for you. If you’ve got fun photos or a stash of spooky Halloween paper, then don’t wait for the holiday to arrive, buy the class and start today!

Here's a sneak peek video of what you'll learn in the class....


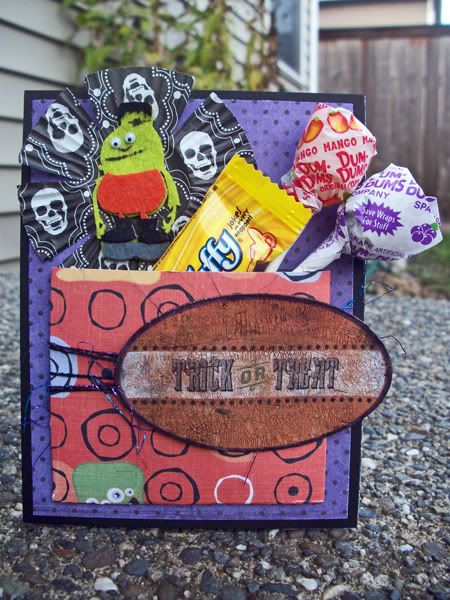
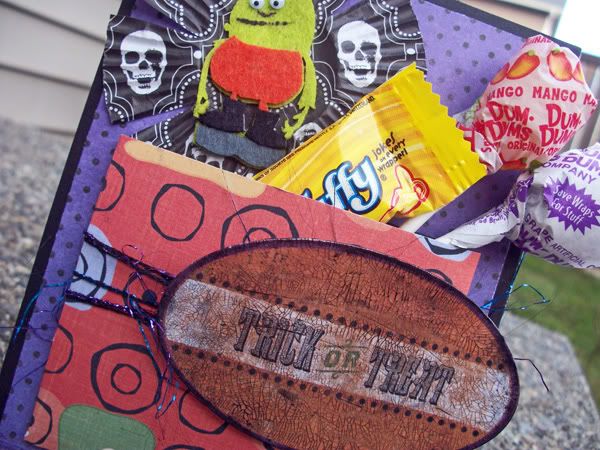
Want more Halloween fun?  Here is a card I've create for a very special little lady.  She'll be getting this in the mail with some treats and some non-candy goodies.  This Trick or Treat card features a couple design ideas I cover in the class.  My favorite is the pocket template I used.  It really takes center stage on this project.  Just print the template onto some cardstock, cut it out, fold it and add some glue!  This pocket template is part of my Halloween Mini-Album to Banner class.  You can continue to use the design techniques in other projects (even non-Halloween ones)! Too cute!


Photobucket
Trick or Treat Card by Mo Esquillo Kao Supplies Patterned Paper: Fancy Pants Designs, K&Co.; Ink: Ranger; Crackle Accents: Ranger; Black Acrylic Paint: Plaid; Other: Cardstock, baking cup, candy, felt sticker, die-cut, yarn; Note: The pocket was created using a pocket template included in my Convertible Halloween Banner to Mini-Album Class.

Photobucket

Here I covered a die-cut greeting with some crackle accents by Ranger.  Gosh that stuff is fun to use!

Andrea and Shaylenne also have classes available so check them out!


Andrea's Bootiful Creations class features Halloween-inspired flowers!  Just think of the fabulous projects you can make!  I adore flowers in my projects...they just seem to make them ZING!

For another fun tutorial check out this Halloween Frame tutorial!


Pin It

Sunday, September 9, 2012

Good 'Ol Card Making!

Pin It

Hey everyone!  I'm back with some cards to share!  Sorry if I've got some repeats but I figure if I can't remember what I've shared....you may not either...lol!  I'm pretty sure these weren't shared on my blog though.

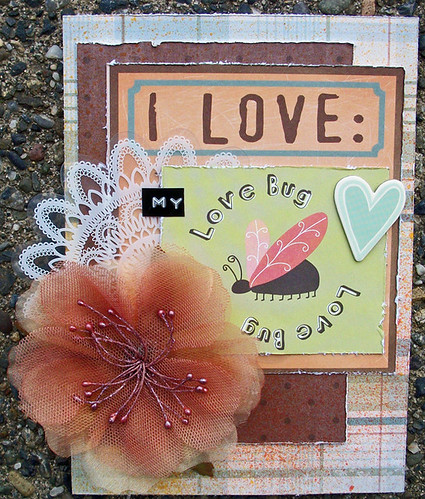
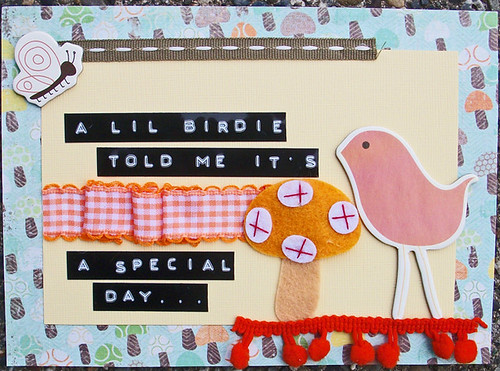
These cards were featured in the April 2012 issue of Scrapbook News and Review.  I love creating cards this way...real easy with only patterned paper, trim, stickers, and good old alphabet stickers!  They come together so easy!

If you pick ONE thing that really stands out and will steal the show, you're good to go.  Here on each card I've chosen a bright color trim, a beautiful pre-made flower, or a fun greeting to showcase on the card.

Click on each photo for supply lists.

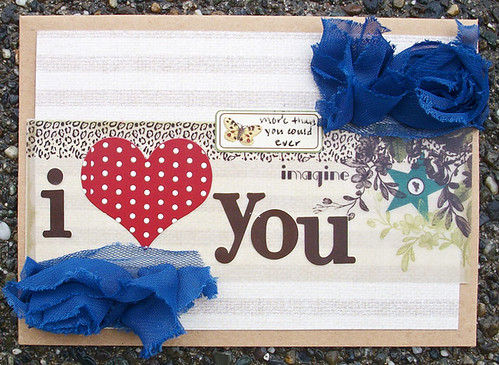
More Than You Could Ever Know

This card was created with only Webster's Pages goodies!  I love me some Webster's Pages!


I Love My Love Bug

I love the colors on this card and my "love bug" sentiment.  Do you have a bunch of those Maya Road acetate doilies?  I've got a BUNCH of em in black AND white!  LOL!  They must have been on sale because I can't seem to get rid of my stash of them!


A Special Day

This card was created with some REAL OLD stash from my craft room!  But what I looooove the most is my trusty DYMO label maker!  Just pull that sucker out and you've got a quick sentiment or some fun journaling!  I stock it the same way I do adhesive...I ALWAYS buy more when I'm out and about at the craft store.  I GOT to make sure I've got some on hand because if I were to run out...it would TOTALLY spoil my crafty day!
Do you find that you create more with patterned paper and embellishments?  Do you gravitate more to stamps?  What DO you seem to be drawn to when creating cards?


Tuesday, July 31, 2012

A Winner and Eye Candy!


Hi Folks!  I have a winner of the free seat to my online class Scrapbooking with Punches and Die-Cuts!  Barb Turpin, if you don't already know, you won!  Thanks so much to everyone for your interest!  Class starts August 3rd if you'd like to sign up!  You don't have to be there the first day or any of the days I actually post the class.  I'll be there for questions and feedback and for at least a couple weeks after the class  finishes up!  You will have access to the class material for an unlimited time so it doesn't go away after the class ends, it will be there hanging out for you!  :)

And because I haven't posted anything to look at for awhile, here is some creations full of love.  The first layout was created for one of my bestest buddies ever!  Oh how I love this girl!  She and her Hubby have continually inspired me to strive and work at my marriage.  For those married, it's not that easy at times, it takes lots of work!  Am I right?  These two serve as a constant reminder of how to stay thoughtful, how to understand each other, and an example of immense loyalty.  I love these two with all my heart.


My dear S and T if you're reading this, I love you guys so much!  Thank you for bringing both of those beautiful babies into this world.  I love your two rug-rats with all my heart and am so honored I am blessed with you all in my life.

I Wish You Love by Maureen Esquillo-Kao Supplies Patterned Paper: Luxe Designs, My Mind’s Eye; Overlay: Luxe Designs; Alphabet Stickers: American Crafts; Journaling Card, Tab: My Mind’s Eye; Flowers: Petaloo; Button: Nikki Sivils; Mists: Lindy’s Stamp Gang, Maya Road; Label Maker: Dymo; Other: Felt hearts, rhinestones, flowers, ribbon

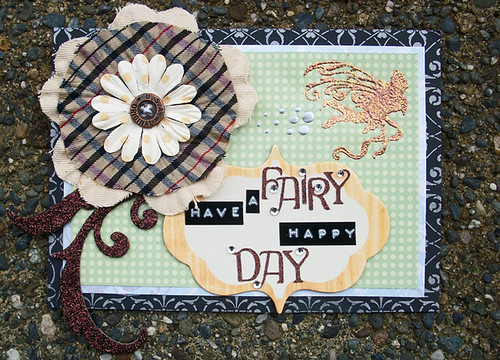
And this next card was very fun to create.  I think my favorite part is the dotting of liquid pearls behind that glittered fairly.  Such a fabulously textured card!  For supply lists of the next two creations, just click on the photos and you will be brought to my Flickr account which has supplies listed!


Fairy Happy Day


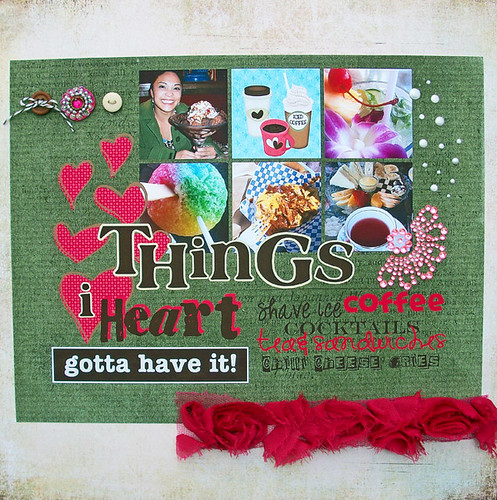
This third project is actually a hybrid layout.  Most of it is digitally created and I went in and added buttons and bling, liquid pearl smatterings and some fun flower trim!  If you don't want bulky pages, this is the way to go!  And in this day and age of skimping and saving, digital creating is a viable option.  Buy a digital kit and you can use it over and over and over.  Think of all the moolah you can save!  Create hybrid or fully digital layouts.  I'm so happy I explored Digi!

Things I Heart

All three projects were created for the March 2012 issue of Scrapbook News and Review.

Have you tried digital creating?  If you've been intrigued and haven't started learning, what's stopped you?
I hope you are all having a fabulous week.

The newest issue of Scrapbook News and Review is available!


My class is starting this Friday and I am beyond excited...but nervous as well!  Wish me luck!  Wish me more students while you're at it (wink wink)!


BLOGWEAR