Showing posts with label Stamp Set. Show all posts

Wednesday, April 1, 2009

Tear it up!

I'm kinda like a pack rat! It has taken years to really change this habit of mine.....or maybe just moving out of my parent's home and realizing I don't have anywhere to put all this stuff! I really try to think "Do I REALLY need to keep this?" and most of the time I think "no" and throw whatever it is away, give it to someone else who could make better use of it, or donate it! And then I forget about it and never look back!

So when I scrap, I've got my recycling bin next to me and I start chucking stuff in there. I keep going with my scrapping and I'll catch a glimpse of a piece of paper in the bin and go...."Oh!" and fish it back out. I find that I usually rescue torn pieces.....like these! I made some cards out of em!


Once again, I used one of my favorite sets "A Beautiful Thing" by Stampin' Up! How sweet? Right? I mean, what would your life really be without certain people in it????? So tell them how thankful you are!

I'm always thankful for the life I have and the love in it. Two very major events in my life have made me more aware that any minute, life can change...any minute you can leave this world. The first was a major car accident where I remember thinking (what I thought was my last thought before dying) "I'm going to die...it's over." I held my breath all the while feeling some power cradling me....keeping me safe. And...I walked away from a roll over accident on the freeway....my car crashed against a barrier. I still don't know how I walked away...I just figured, "There must be something I've yet to do in this world since I'm still in it."

Another one of my worse fears ALSO happened a few years ago. At the age of 2, my daughter fell out of a second story window onto concrete. Not a day goes by that I first cringe at the thought of what my life would be like without her and I say a daily prayer for every day I have with my family. She's 6 now and in good health. She's got a scar right above her right eye from the fall. It's a reminder to me to be thankful. And I am. I still shiver as I think of that day.

Okay, sorry bout that! I just started typing and before you know it, I've gone and told you all that crazy stuff! Well, on to brighter things! Now, I'll continue...with MORE cool photos!


Here's is the image of the rest of the stamp set. Sooooo cute! Love it love it love it!


The patterned paper came from this nummy paper pack by Me and My Big Ideas!


Here's a cool stamp for you Kitty Kat lovers!


I adore this set...probably because of the cheesy humor...that's MY kinda humor!


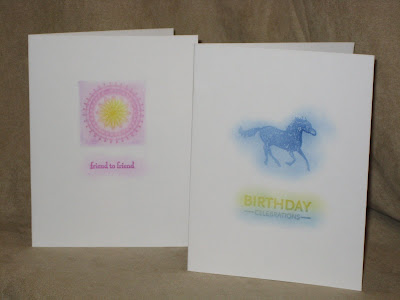
These cards all were matchy matchy! Simple, quick and all from scraps!


Once again, I used a stamp from the "For a Friend" set by Stampin' Up! which is retired. Like it? Want it? Try searching Ebay!

Okeee Pokey! If you haven't guessed, one of my goals for 2009 is to use up some of my sCRAPs! So break into your stash....if it's been sitting there for awhile, you REALLY need o put some of them to use! Spend a day making a buncha cards and keep them in a box to give when an occasion pops up! Tuck some envelopes in that box as well as stamps.....and a pen! You have no excuse NOT to send your girlfriend that Birthday card!

Thursday, March 12, 2009

Fun with Flowers, Buttons, and Brads.......oh my!!!!!


I found some pieces of Bali Breeze DSP (Designer Series Paper). Sorry, if you love it too, it's RETIRED :( You'll have to search for it!!! I've tried to find some...boo hoo. Oh well, there's tons of new cute DSP now!!!!


I love the colors in this embellishment jar! It is one of the Noteworthy Embellishment Jars by Making Memories and the color group is named Hillary. Click on the image above to check out other colors choices for these super cute flower/button jars! Love love LOVE em!!!!!


One of my favorite stamp sets is the Upsy Daisy set that Stampin' Up! makes! I've definitely used it enough to pay for itself ten times over!!!! Click on the stamp set image (copyright Stampin' Up!) to see more ideas or to order. (There is an awesome sale going on called Sale-A-Bration and you get a free stamp set for every $50 spend! Contact me to order and I will tell you about specials only available through ME!)


Here's a close up! I used Zots to adhere my flowers to the card. Those suckers really stick!!!! You can be sure that when you use Zots adhesive dots, your card won't fall apart on it's recipient!


Another cute flower card made with only a few scraps. I used Zots to adhere the buttons onto the card...be careful because they are not repositionable! When it sticks....it's pretty much STUCK!

Below is a view of all the patterns in the Urban Garden DSP which was used in this "thank you" card. Click on the image below (copyright Stampin' UP!) for more information on this patterned paper pack!

What's so cool about this DSP is that it actually coordinates with the Upsy Daisy stamp set!


Well, that's it for today's scrappy show and tell!!!! But I got more....just you wait! If you haven't already, be sure to check out my Stampin' Up! website! There are lots more ideas there!!!!! There are even supply lists for a lot of the projects!
Thanks for stopping by!!!!

Wednesday, February 11, 2009

Valentine's Day Treat Bag!

Love You Much Stamp Set Item #113756
(image copyright Stampin' Up!)

Hi Everyone! I know this might be a little late for ideas for Valentine's Day...but it's a quick project you could do...and you could apply the idea to a birthday party, Christmas treat bag, or party favors! I wanted to create a treat bag that my daughter could give away to her classmates on Valentine's Day. We did a mini 3x3 card last year...but wanted to do CANDY this time!


The bags had about 4 pieces of candy each: mini M&M's, Nerds, Laffy Taffy, and my ALL TIME favorite candy Bottle Caps! If you wanted to put less candy or smaller pieces in the bag, just fold the top flap in half!
I actually used some old neon paper I had (I'm not a fan of neon colors at all so jumped at this chance to use them up!). I used regular printer type paper...not cardstock. Other options would be to use construction paper or scrap pieces of cardstock.

I will be posting a video on my YouTube Channel. If you subscribe to this blog, you get ideas more often than subscribing to my YouTube videos only....I blog way more than I make videos!!!!

This project would be awesome to do with children. My daughter Isabel LOVED it!!!! She got to color, put candy in bags, glue on hearts, use a stapler....she did most of the work! Here's what it looked like:
Now, since we had to make a total of 23, the use of punches REALLY allowed us to make them VERY QUICKLY! Here are all the items we used:

1) 4x4 pieces of paper or cardstock.
2) Scallop Circle Punch (Stampin' Up!)
3) Heart to Heart Punch (Stampin' Up!)
4) craft glue
5) 1/16" Handheld Punch (Stampin' Up!)
6) Stapler
7) Real Red Classic Stampin' Pad
8) Blender Pen
9) Basic Black Classic Stampin' Pad
10) 4 x 6 inch Plastic Baggie (got it at Mitchael's in the candy making section)
11) Love You Much Stamp Set by Stampin' Up!

(Photos of some of these items can be found at the end of this post. Those photos are copyright Stampin' Up!)


My 6 year old did the stamping and coloring (as you can see from the image...he he)...she did such a great job.....SHE'S SO CRAFTY! I punched out the circle scallops and hearts since her hands are so small...they couldn't manage the punches as easily. Maybe if we chose a less complicated shape to punch out, she would have done fine on her own.

I folded the 4x4 pieces in half, placed it at the top of the bag, then stapled it. You then glue on the scallop circle OVER the staple so that you can't see it! If you have the time, add pop dots or foam adhesive to give some dimension to the scallops and the hearts!!!! We had to go quickly to allow enough time in the day to do some "girl time" stuff at the mall and run errands! We had TONS of fun by the way!! Here's a side note....if you like bread pudding.....ya gotta stop over at the Nordstrom Bistro (in Lynnwood Nordstrom) and try their bread pudding.......YUMMMMMMMMMMM!


Let's get back on track.....On the back of bag, I had her put "from Isabel". Since they would be passing SO MANY of these out, I thought it easiest to NOT put her classmates names on them.
At the end of the day, Isabel said she had SO MUCH FUN making these Valentine's Day Treat Bags and spending time with her Mommy on our little "Girls Only Day" together. We're gonna make this "Girls Only Day" a monthly thing!!!!! NO BOYS ALLOWED!!!!
HAPPY HEARTS DAY!!!!

Scallop Circle Punch


Heart to Heart Punch


1/16" Handheld Punch

Thursday, January 22, 2009

Newborn Baby Girl Scrapbook Page: Baby Presley


Finally, I've done a scrapbook page! This one took me a few days to complete...lots of interruptions. The subject is my cutie patootie niece Presley!
Let me know if you would like to know any measurements. I'll post a photo of the page over the weekend!!!

Tuesday, November 25, 2008

November Project of the Month: Super Quick Cards

I got this "quick card" idea when I attended a Stampin' Up! event last year. One of the great things about being a Stampin' Up! Demonstrator is being able to attend these events and swap cards with everyone! You leave with such inspiration and excitement!. But I have to apologize because I do not remember who I learned this technique from. It was one of the demonstrator booths at the event (when I do find out, I will post her name).
Supply List
Supplies Stampin' Up! unless otherwise noted

Stamp Sets:
Wanted 109395
Pocket Silhouettes 111672
Boho Backgrounds 111072
Upsy Daisy 111710

Cardstock:
Whisper White 100730

Ink:
Versamark Pad 102283

Accessories:
Sponge Daubers 102892
On Board Essentials 112085
Non-Smear Pastels by The Stencil Collection
*Stampin' Pastels 105542 blend better!

I knew I wanted to make some card packs to give to my friends last year and so I made these cards! It went pretty quick. I think it only took me a couple of hours to make about 80 cards!
I think Birthday and Thank You cards are most popular.

The best way to go about it is to decide how many cards you want in a pack. I think 3 are sufficient to give in a package. Design 3 cards which are simple. It is best to choose solid images which will pick up the color of the chalk.

You stamp your image with a watermark ink or Versamark Pad, then take a sponge dauber and chalk/pastels to rub the color on. The chalk sticks to the Versamark ink!

The stamp image I used here is in between an outlined image and solid image. It worked out well. But when you compare this to the other card with the horse, I actually like the horse image better because it is more solid.

As you can see on the video, I use a chipboard frame to "frame" the image. You could also use the left over negative space from your chipboard packs to use as stencils! Or, you could just not use a stencil and just rub the chalk on (as I did with the next card with the horse)....the effect is still very nice! I did this with the sentiment "friend to friend". I just took my chalk and rubbed it on in a circular motion over the words.


Here you see the horse card which I am so very fond of. I didn't use any stencils for the second card.....just rubbed on the chalk.


Here's a closer look the the horse image. I think the dark and bright colors look very nice against the white cardstock!


Chalk is very forgiving......it doesn't take a lot of know how to use it....you just rub it on!
I think I'll be giving these away again this year :)


I packaged them in medium sized cellophane bags 102757 with the envelopes and tied them with ribbon. You could also use raffia. You could choose to not use a cellophane bag and just tie ribbon around the 3 cards and envelops and it looks just as nice!


Stamp something inside if you wish. You can use dye ink or the same technique with Versamark ink and chalk.

People have told me how these cards have come in handy!
They're very inexpensive to make too!
Thanks for coming by my blog!
Happy Thanksgiving
and
Happy Stamping!
below is the YouTube video on this card


Here are some recommendations of Holiday Stamp Sets fthat would work well for this project:
1) Spotlight on Christmas 111694 p. 33 IBC (Idea Book & Catalog)
2) Season of Joy 110384 p. 34 IBC
3) Holiday Trinkets 111650 p. 35 IBC
4) Two Cool Dudes 111708 p. 41 IBC
5) A Holly, Jolly Christmas 111558 p. 41
6) Shalom Sayings 111686 p. 44 IBC
7) Happy Kwanzaa 111640 p. 45 IBC
8) Best Wishes & More 111602 p. 55 IBC
9) Season of Simple Grace 111778 p. 16 HMC (Holiday Mini Catalog)
Click on the catalogs below to download them!


2008/2009 IDEA BOOK AND CATALOG (IBC)


HOLIDAY MINI CATALOG (HMC)

BLOGWEAR